

How to Choose the Right Cast Iron Pipe Repair
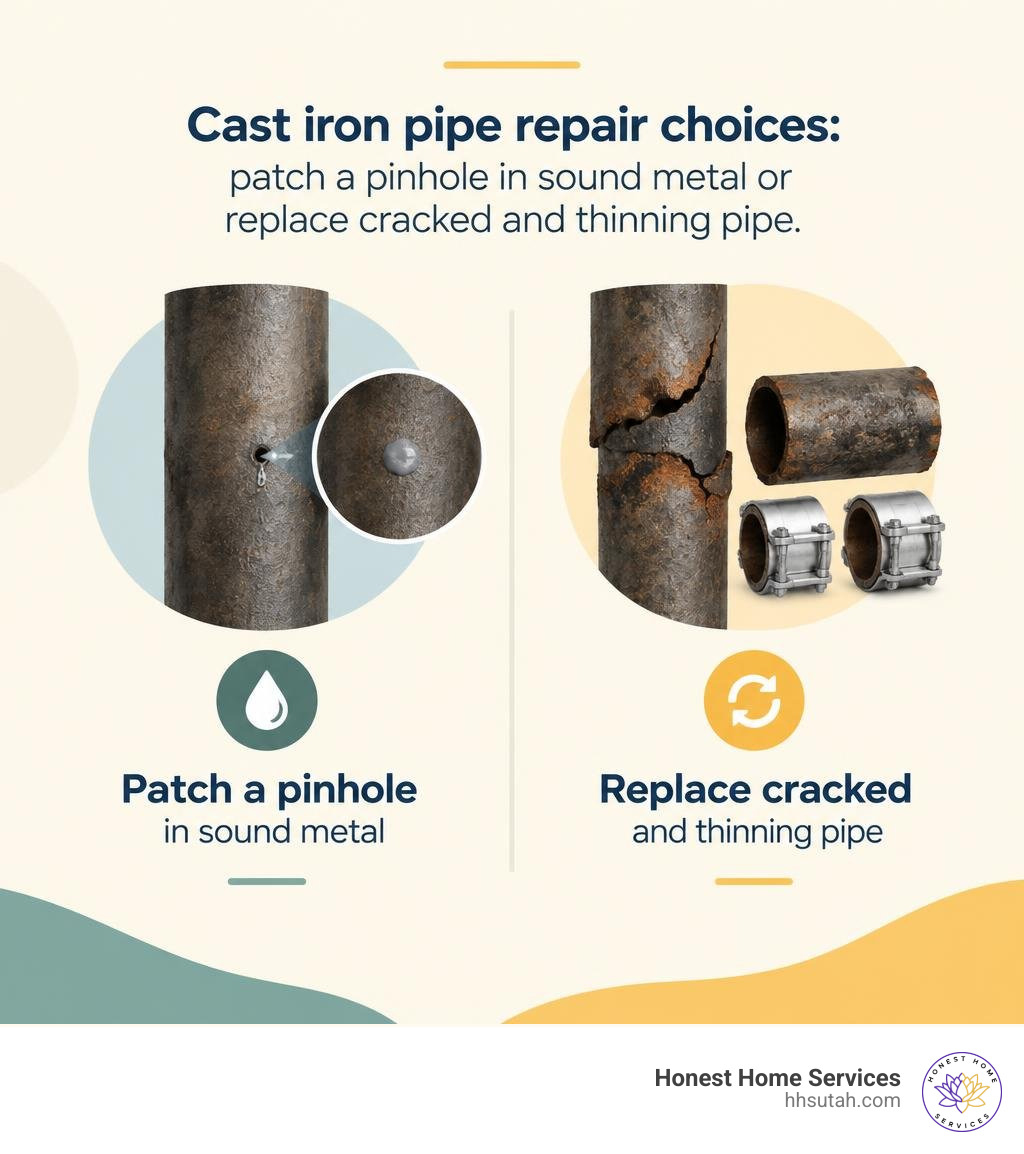
Find the leak and check the pipe around it before choosing a fix. A small pinhole in solid metal may be patched with drain-rated epoxy after the surface is cleaned and dried. A long crack, crumbling metal, or several leaks calls for cutting out the damaged section and joining sound pipe with properly sized shielded couplings. If the leak is on a vertical stack, have a plumber assess it before cutting; the pipe above must be supported.
We are Honest Home Services, a licensed and insured Utah plumbing team with more than 20 years of experience in drain, sewer, and pipe repairs. We bring that experience to cast iron pipe repair, helping you tell a small leak from a sign of wider pipe failure.
Explore more about cast iron pipe repair:
Diagnosing Damage and Failures in Aging Drain Lines
Cast iron plumbing has an impressive heritage. A well-maintained vintage installation has an expected lifespan of 80 to 100 years, outlasting many alternative materials over total property lifespans. However, time, moisture, and chemical exposure eventually degrade even the stoutest plumbing lines. Understanding how elemental iron interacts with domestic wastewater is essential when evaluating drain failures.
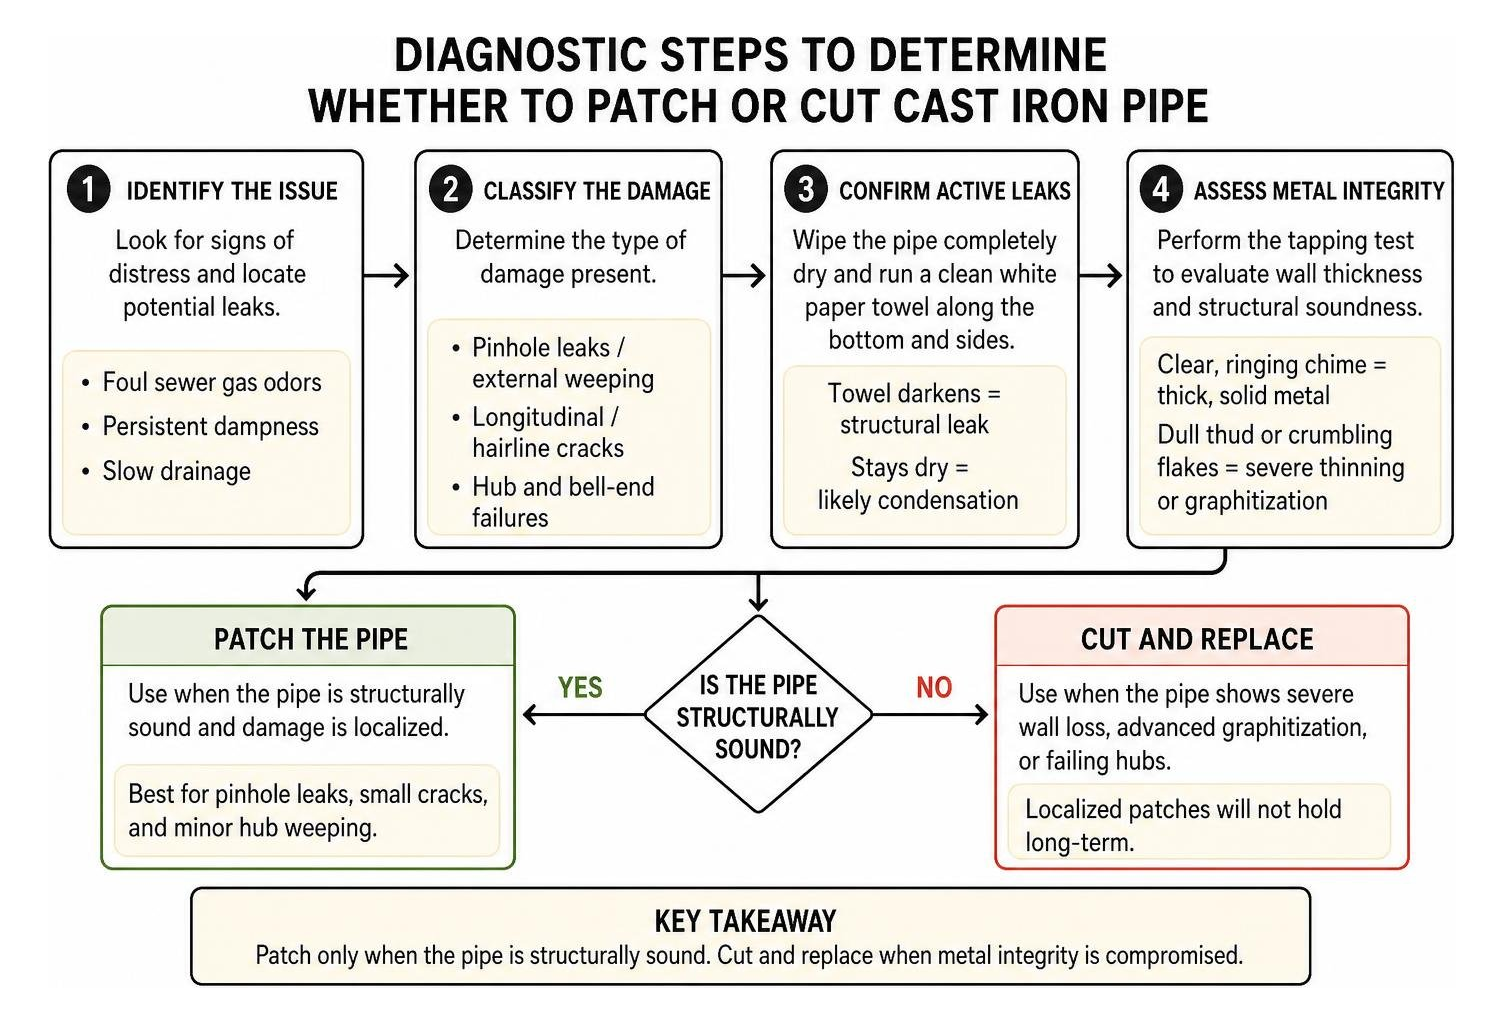
In homes across Salt Lake County, Davis County, and Park City, aging drain infrastructure often shows signs of distress before catastrophic leaks occur. Foul sewer gas odors escaping around wall cavities, persistent dampness along basement floor slabs, and slow drainage are classic warning signs. When managing basement dampness, addressing a leaking basement cast iron pipe promptly prevents localized wood rot and subfloor structural deterioration.
Identifying Pinhole Leaks, Cracks, and Hub Failures
Damage on cast iron pipes typically falls into three categories:
- Pinhole Leaks and External Weeping: Often caused by localized mineral oxidation or internal channeling along the pipe invert (the bottom interior curve). Internal wastewater erosion gradually wears down the bottom wall until pinholes open up.
- Longitudinal and Hairline Cracks: These run along the pipe length, often triggered by settling ground, structural loading, or seasonal thermal expansion cycles.
- Hub and Bell-End Failures: The enlarged joints (hubs) where pipe sections interlock can separate, crack, or suffer from decayed sealing materials, allowing wastewater and gases to seep through.
To locate hard-to-see leaks, wipe the suspect area completely dry and run a clean white paper towel along the bottom and sides of the pipe. Moisture from hairline fractures will immediately darken the paper, distinguishing real structural leaks from external condensation.
The Tapping Test and Metal Integrity Assessment
Visual inspections do not always reveal how much structural metal remains inside an old pipe. Cast iron is subject to graphitization, a process where iron leaching leaves behind a brittle carbon matrix that looks like solid metal but lacks structural strength.
To evaluate wall thickness, use the acoustic “tapping test”:
- Lightly strike the pipe along various points using a small metal wrench or ball-peen hammer.
- A clear, high-pitched ringing chime indicates thick, solid, structurally sound metal.
- A dull, hollow “thud” indicates severe wall thinning, heavy internal scaling, or advanced graphitization.
If tapping creates a dull thud or dislodges crumbling flakes, localized surface patches will not hold long-term, and physical section replacement is necessary.
Essential Approaches to Cast Iron Pipe Repair
When you need practical guidance to fix a drain pipe leak, selecting the proper repair method depends directly on pipe soundness and the mechanical demands of the line.
| Repair Method | Best Suited For | Expected Longevity | Difficulty Level |
|---|---|---|---|
| Epoxy & Composite Bandage | Minor pinholes, hairline cracks on sound pipe walls | 5 to 20 years | Moderate (DIY-friendly) |
| Traditional Oakum & Lead | Leaking cast iron bell-and-spigot hub joints | 10 to 30+ years | Advanced |
| Cut-and-Replace Transition | Longitudinal splits, severe channeling, rotted pipe | 30 to 50+ years | Advanced / Professional |
| Full Stack Replacement | >25–30% wall thinning, recurrent systemic cracking | 50+ years | Professional Only |
Surface Preparation Protocols for Cast Iron Pipe Repair
Every chemical sealant, epoxy putty, or composite bandage relies entirely on mechanical bonding to raw metal. Applying epoxy over rust or loose paint guarantees bond failure within weeks.
- Depressurize and Dry: Ensure no plumbing fixtures above the damaged pipe run water during the repair. Dry the pipe exterior completely.
- Mechanical Cleaning: Scrape away heavy rust flakes with a stiff wire wheel on a cordless drill or a coarse wire hand brush.
- Sand to Raw Metal: Use 80-grit emery cloth or coarse sandpaper to scour the repair zone at least 2 inches past the damaged area until bright, bare metal shows.
- Degrease: Wipe down the area thoroughly with pure acetone or a residue-free solvent degreaser to strip oils, soap scum, and microscopic debris.
Patching Minor Defects with Epoxy and Composite Bandages
For localized pinhole leaks on thick-walled pipes, a two-part steel-reinforced epoxy putty provides a durable seal. Knead the two-part compound until it achieves a uniform gray color with no color streaks. Firmly press the putty directly into the pinhole or hairline fracture, feathering the edges outwards at least 1 inch across the surrounding bare metal.
For structural reinforcement, wrap the patch with a moisture-activated polyurethane composite bandage. High-performance composite repair wraps cure rock-solid within 30 to 45 minutes, offering pressure ratings up to 30 bar and temperature resistance up to 200ºC (390ºF). On non-pressurized gravity drain lines, properly applied composite repairs deliver 5 to 20 years of reliable service.
Packing Traditional Bell and Hub Joints with Oakum
When old vertical soil stacks develop leaks at the hub joints, traditional packing techniques restore a watertight seal without requiring pipe removal.
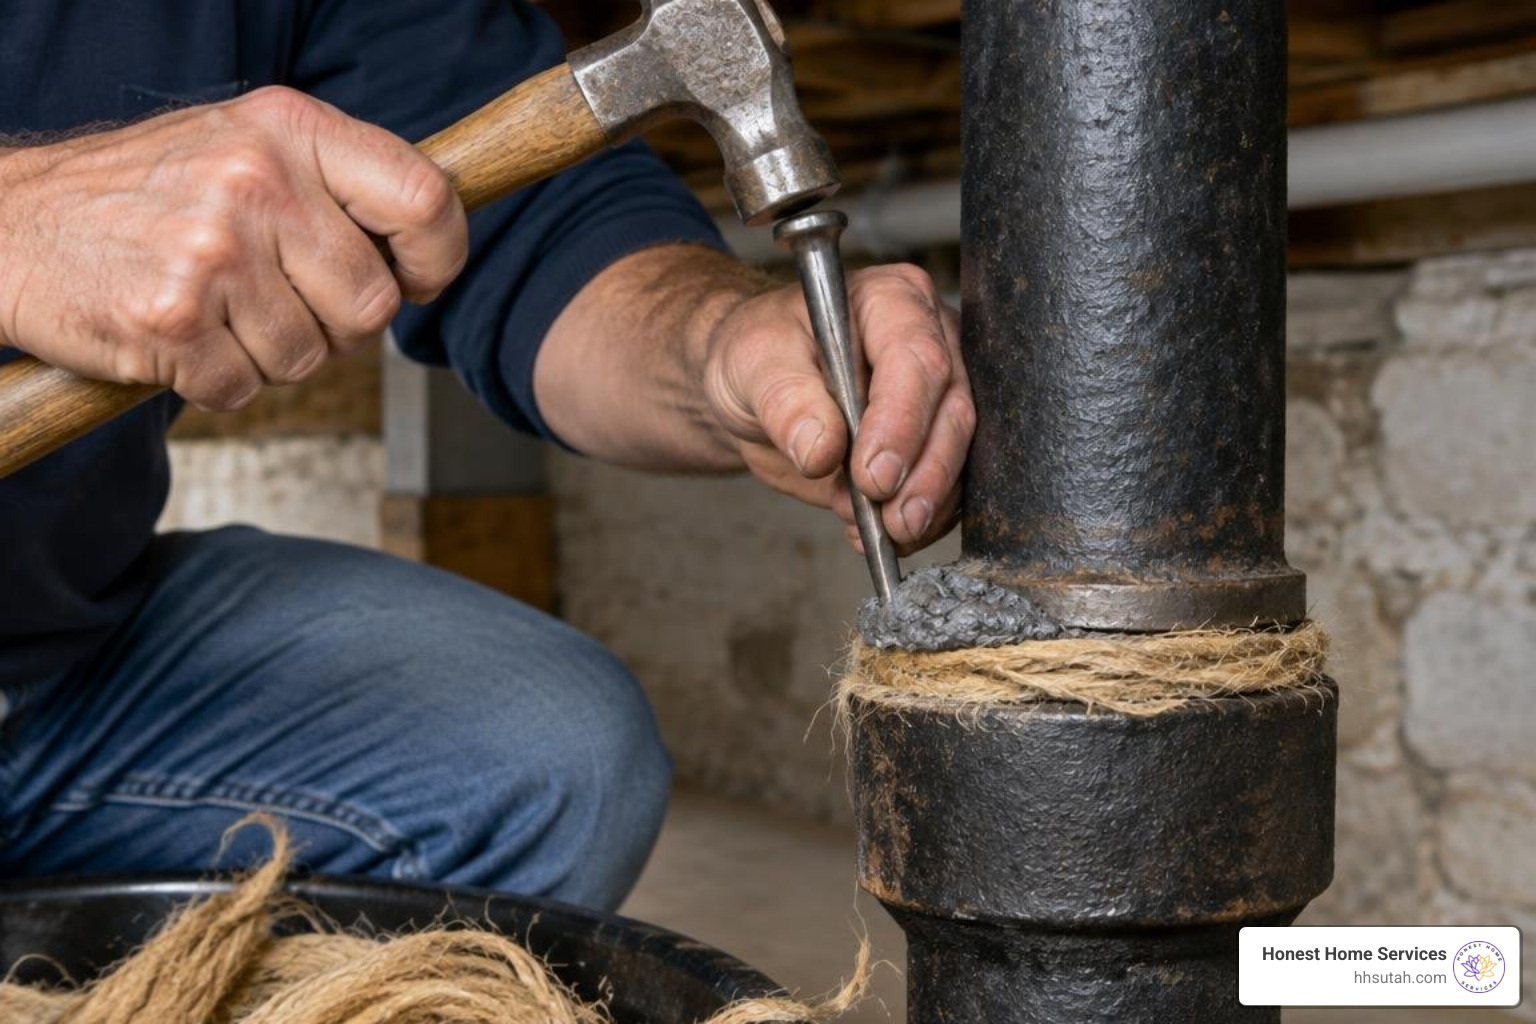
- Clear the Old Joint: Chisel out decayed lead and rotted packing material from the annular space between the hub and the spigot.
- Pack the Oakum: Wrap strands of treated hemp oakum clockwise around the inner pipe. Use a dedicated offset yarning iron and ball-peen hammer to drive the strands deep into the hub base.
- Compress Firmly: Pack successive layers until the oakum is compressed tightly—leaving exactly 1 inch of clearance at the top of the hub.
- Seal with Lead Wool: Rather than pouring dangerous molten lead into confined indoor quarters, pack cold-spun lead wool into the top 1-inch void. Drive the lead wool firmly using a caulking iron until the metal forms a solid, gas-tight mechanical cap.
The Cut-and-Replace Transition Method Using PVC
When cast iron suffers severe rot, longitudinal splits, or localized collapse, cutting out the failed iron and installing a modern Schedule 40 PVC bridge delivers an effective solution for leaking pipes.
Pipe Cutting and Stack Support Safety
Cast iron is dense, heavy, and brittle. A standard 10-foot section of 4-inch cast iron soil pipe can weigh upwards of 70 pounds.
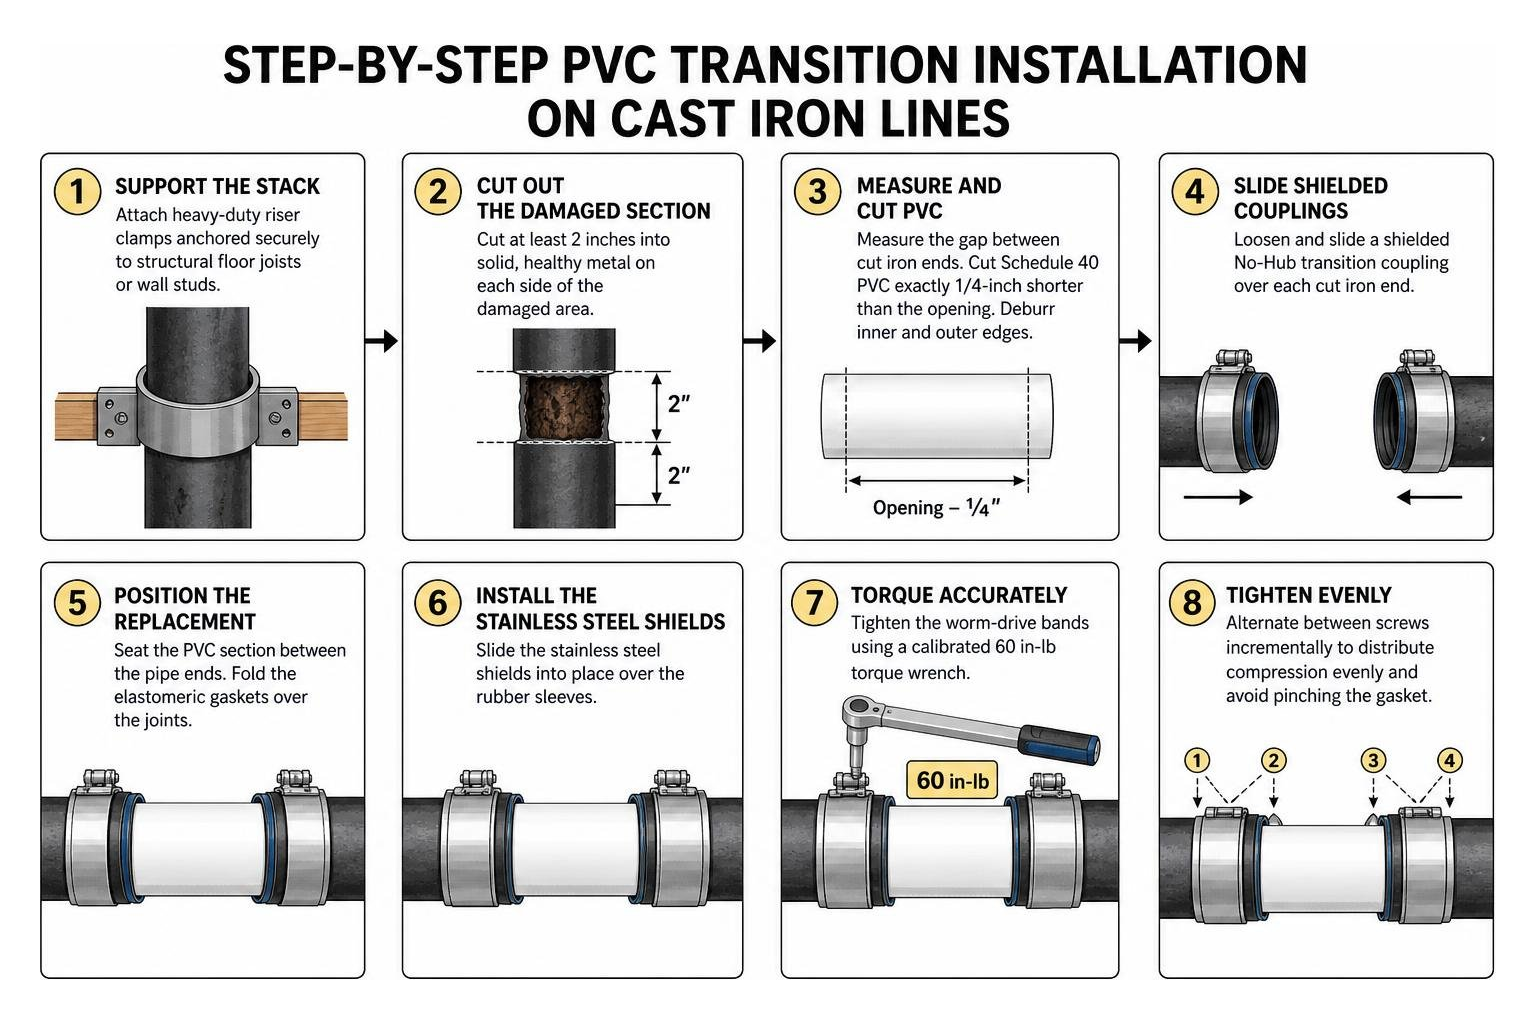
- Support the Stack First: Before making cuts on a vertical pipe run, attach heavy-duty riser clamps anchored securely to structural floor joists or wall studs. Failing to support the upper stack can cause hundreds of pounds of overhead iron to drop, leading to structural damage and severe injury.
- Select the Right Cutting Tools: Avoid standard bi-metal reciprocating saw blades, which dull quickly against iron. Use a specialized carbide-grit reciprocating saw blade, a diamond-grit blade, or a professional ratcheting chain snap cutter.
- Execute Cold Cuts: Cut slowly and cleanly at least 2 inches into solid, healthy metal on either side of the damaged section.
Installing Shielded No-Hub Couplings at 60 Inch-Pounds
Bridging older cast iron to modern PVC requires a secure mechanical transition.
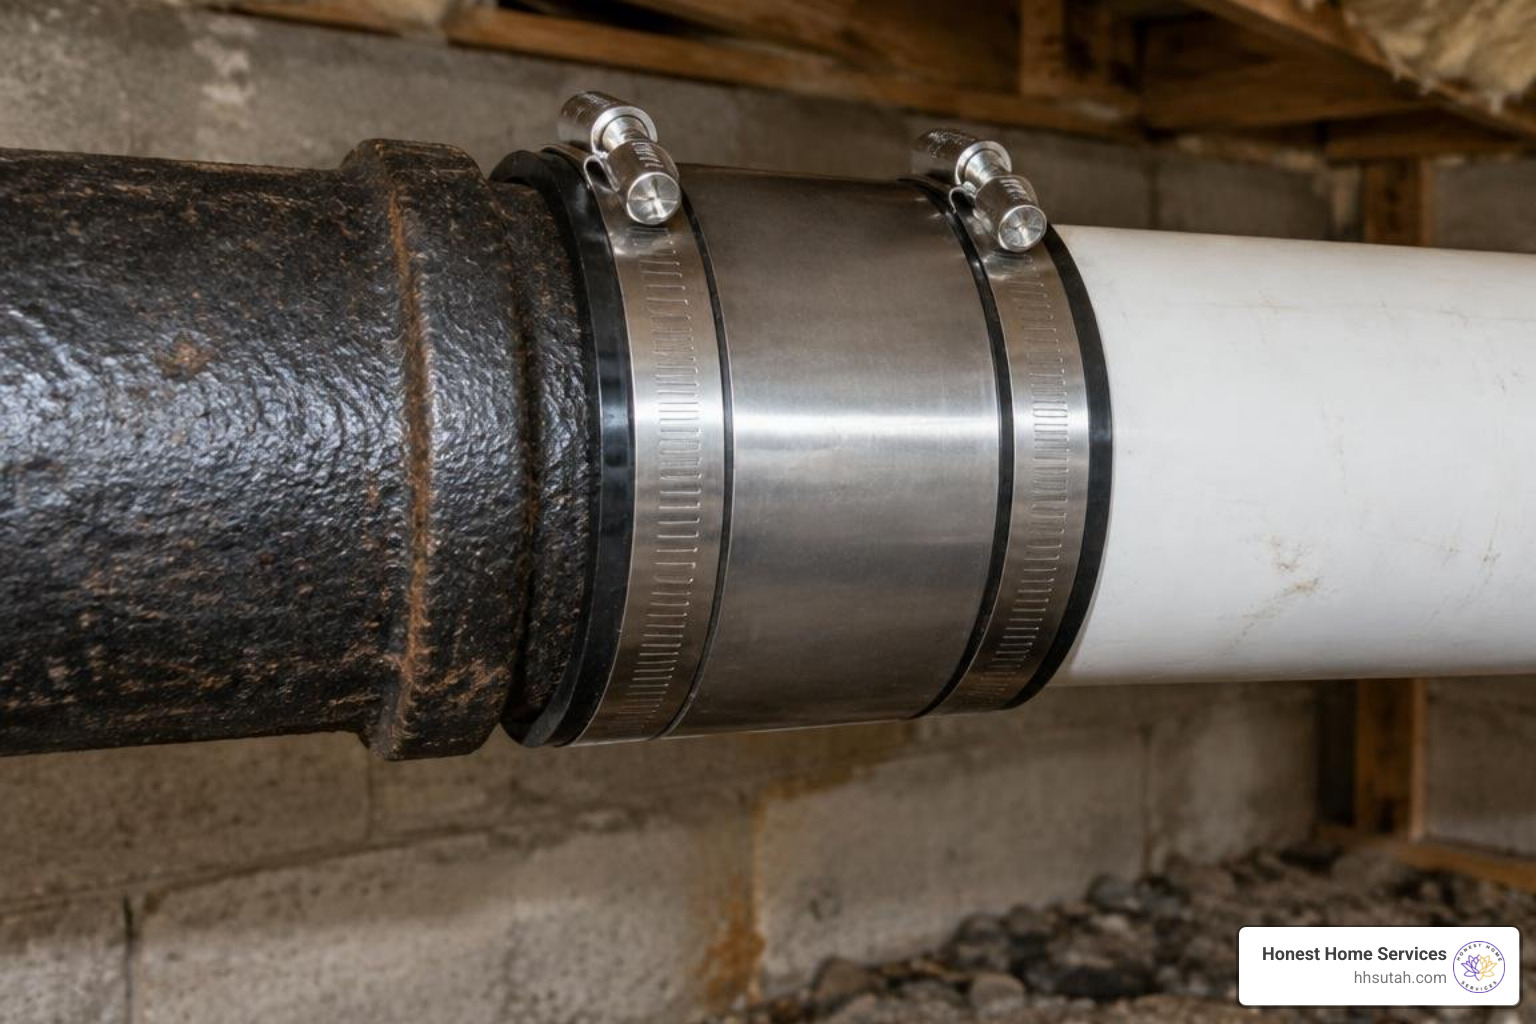
- Measure and Cut PVC: Measure the gap between the cut cast iron ends. Cut a section of Schedule 40 PVC exactly 1/4-inch shorter than the measured opening to accommodate thermal expansion. Deburr the inner and outer PVC edges.
- Slide Shielded Couplings: Loosen and slide a shielded No-Hub transition coupling over each cut iron end. These couplings feature an inner neoprene elastomeric sleeve surrounded by a heavy-gauge stainless steel outer band.
- Position the Replacement: Seat the PVC section between the pipe ends, fold the elastomeric gaskets over the joints, and slide the stainless steel shields into place over the rubber sleeves.
- Torque Accurately: Tighten the worm-drive bands using a calibrated 60 in-lb torque wrench. Alternate between screws incrementally to distribute compression evenly and avoid pinching the gasket.
Long-Term Maintenance and System Longevity
Once your pipes are repaired, routine maintenance protects remaining cast iron from early failure.
Preventing Corrosion and Chemical Degradation
Cast iron pipe interiors deteriorate rapidly when exposed to harsh chemicals. Commercial caustic or acid drain openers react with iron, accelerating internal channel rot along the bottom of the pipe.
- Switch to Enzymes: Use non-corrosive, bacterial or enzymatic drain cleaners monthly to break down grease without damaging metal walls.
- Descale Periodically: Aging cast iron accumulates rough internal rust nodules (tuberculation) that catch paper and waste. Periodic mechanical descaling or high-pressure hydro-jetting removes built-up scale, restoring full pipe diameter and reducing waste stagnation.
When to Choose Replacement Over Cast Iron Pipe Repair
While localized patching and PVC transition bridges resolve individual leaks, extensive decay requires wider intervention.
If camera inspection or tapping tests reveal that more than 25% to 30% of a cast iron pipe wall or run shows severe external weeping, bottom channeling, or wall thinning, ongoing spot repairs become impractical. In these scenarios, replacing the complete stack or scheduling cured-in-place pipe (CIPP) trenchless relining provides long-term peace of mind and prevents repeated water damage.
Frequently Asked Questions About Cast Iron Pipe Repair
Can I use standard unshielded rubber boots for drain transitions?
Standard unshielded flexible rubber boots (often referred to generically as Fernco couplings) should not be used on indoor transition repairs. Unshielded rubber lacks rigid structural support and can buckle, shear, or deform under soil shifting or stack weight, causing misalignments and blockages. Uniform plumbing codes require shielded No-Hub couplings with a stainless steel sleeve to ensure proper alignment and seal integrity.
Do I need a building permit for minor under-sink pipe repairs?
In most Utah jurisdictions—including Salt Lake City, Layton, West Jordan, and Draper—minor localized plumbing repairs such as replacing an under-sink trap or swapping a short exposed drain line section are considered ordinary maintenance and do not require a formal building permit. However, extensive drainage modifications, whole-stack replacements, or underground sewer main work require municipal permits and code inspections.
Can JB Weld or standard epoxy putty fix a cracked drain pipe?
Water-resistant metal epoxy compounds, including marine-grade formulations and JB Weld SteelStik, work well for temporary patches or small pinhole repairs on gravity-fed drain lines. However, they cannot bridge wide structural fractures or flex with normal thermal expansion over time. For structural longitudinal cracks, replacing the damaged segment with PVC and shielded couplings remains the reliable standard.
Conclusion
Aging cast iron plumbing is durable, but when leaks appear, selecting the right repair method preserves your plumbing system and protects your home. Whether sealing a minor pinhole with high-strength composite wraps or replacing damaged sections with shielded transitions, proper surface preparation and precise installation prevent recurring issues.
If you suspect deep structural decay, hear hollow tapping on your soil stack, or need expert guidance on whole-house drainage, our local technicians are here to help. Review our complete pipe repair guide or contact Honest Home Services today to keep your home’s plumbing running smoothly.