
Why Your Pressure Release Valve Dripping Deserves Immediate Attention
A pressure release valve dripping on your water heater is one of those problems that’s easy to ignore — but shouldn’t be. That slow drip could mean your system is working exactly as designed, or it could be an early warning sign of something far more serious.
Here’s a quick answer based on the most common causes:
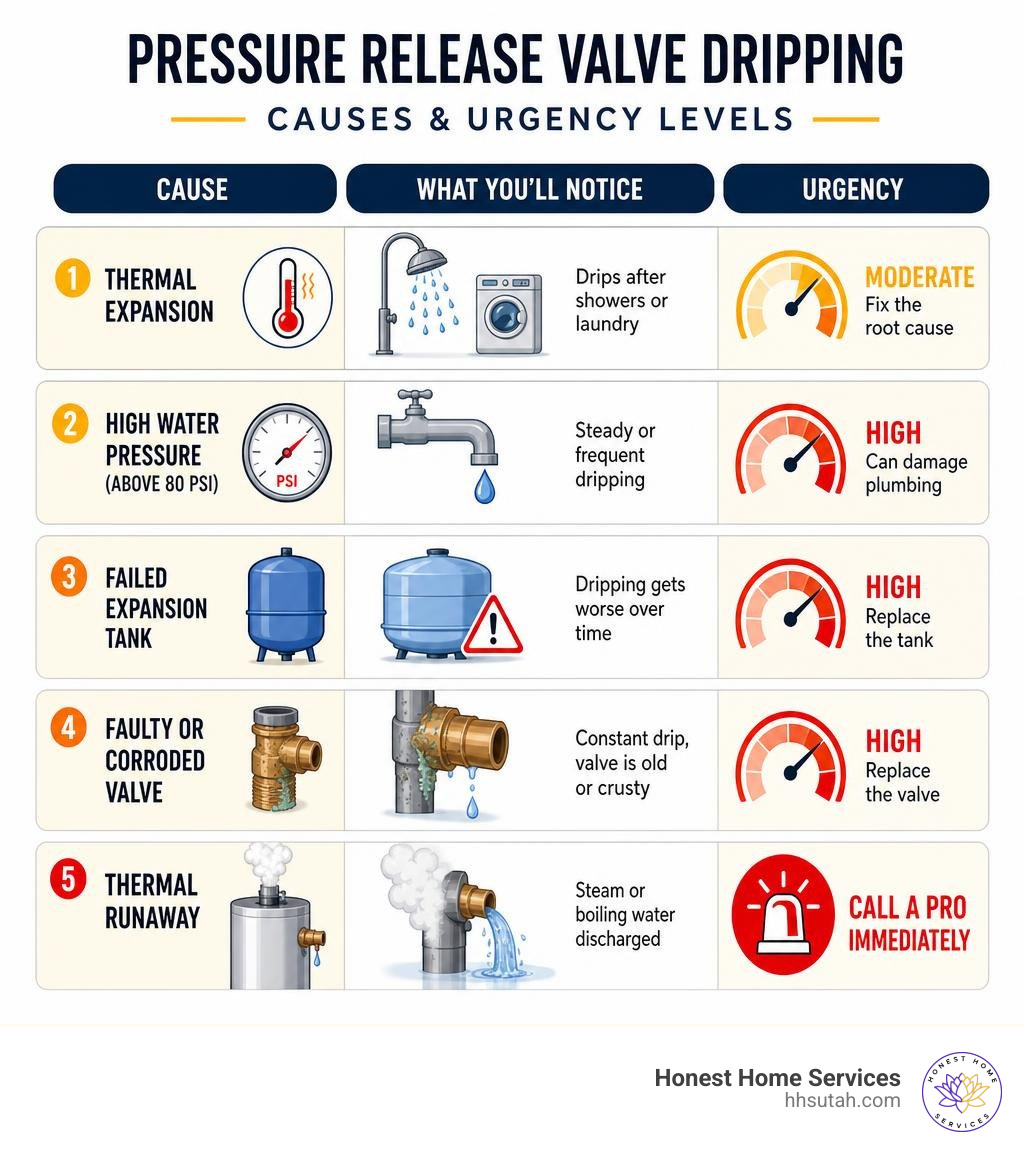
| Cause | What You’ll Notice | Urgency |
|---|---|---|
| Thermal expansion | Drips after showers or laundry | Moderate — fix the root cause |
| High water pressure (above 80 PSI) | Steady or frequent dripping | High — can damage plumbing |
| Failed expansion tank | Dripping gets worse over time | High — replace the tank |
| Faulty or corroded valve | Constant drip, valve is old or crusty | High — replace the valve |
| Thermal runaway | Steam or boiling water discharged | Call a pro immediately |
A small puddle near your water heater might dry up before you think twice about it. But if that water is coming from the temperature and pressure (T&P) relief valve, your water heater is trying to tell you something important — and ignoring it can lead to water damage, mold, or in extreme cases, a catastrophic tank failure.
The good news? Most causes are fixable, and many homeowners in Northern Utah deal with this exact issue due to the region’s hard water and closed plumbing systems.
At Honest Home Services, we’ve spent over 20 years diagnosing and repairing pressure release valve dripping problems for homeowners and businesses across Northern Utah. In this guide, we’ll walk you through exactly how to find the cause and fix it safely.
What Causes a Pressure Release Valve Dripping Issue?
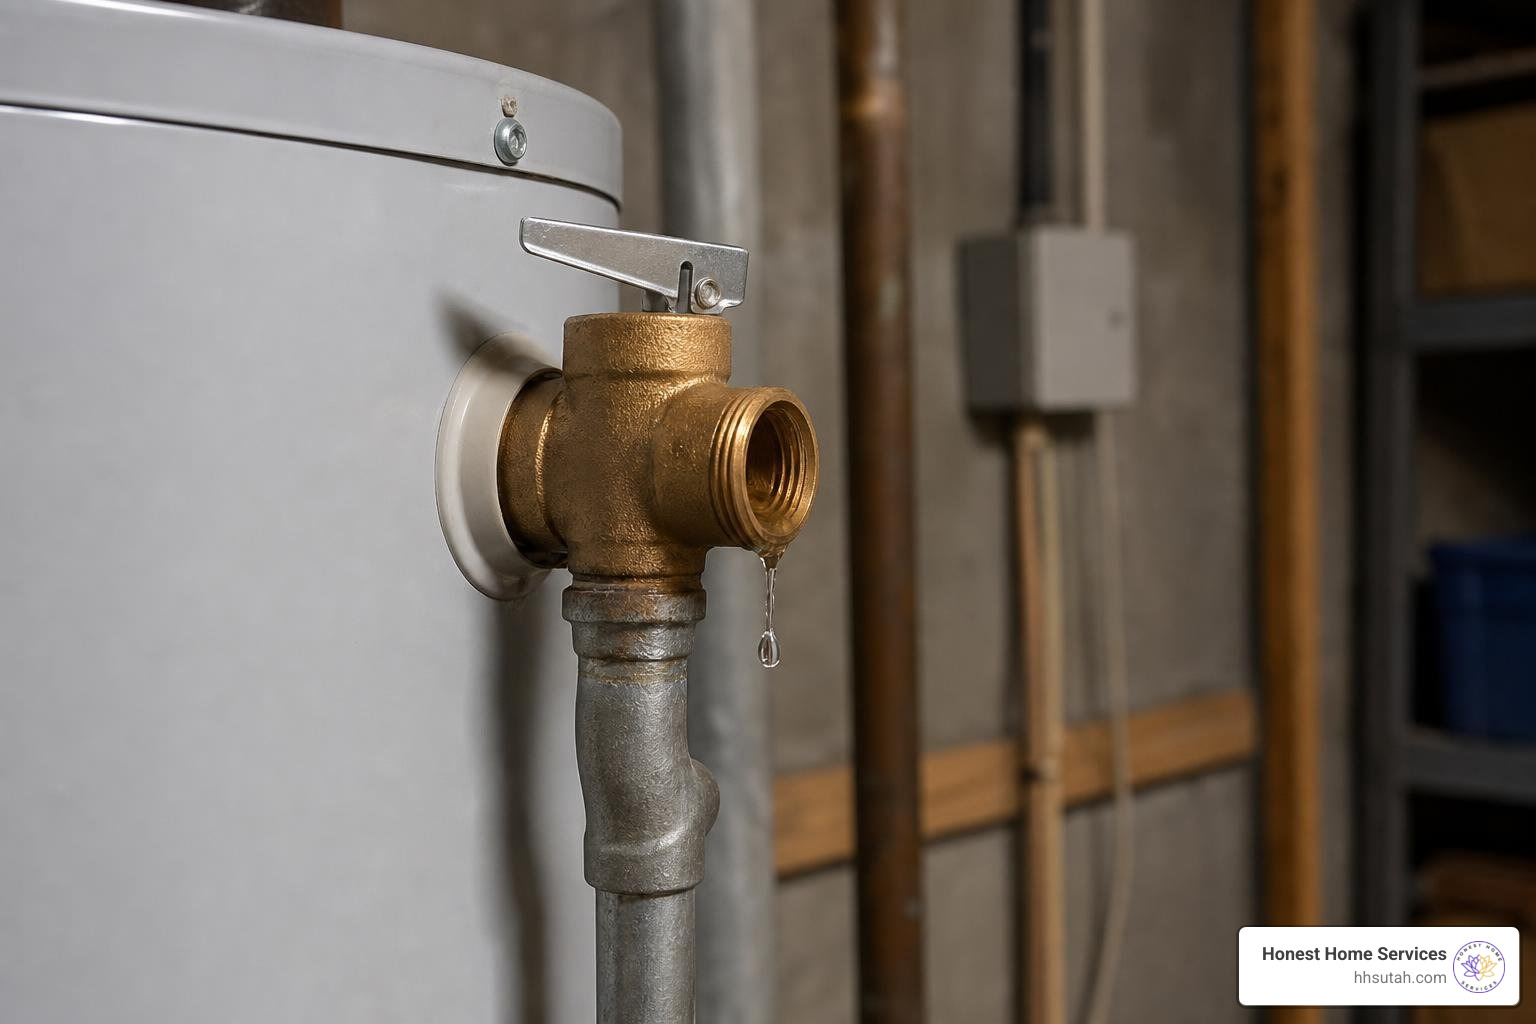
To understand why your temperature and pressure relief (T&P) valve is weeping, we first have to look at what this little device actually does. The T&P valve is a mechanical safety sentinel mounted on the top or side of your water heater. It contains a spring-loaded disc designed to snap open automatically if the internal tank temperature hits 210°F or if the pressure reaches 150 PSI.
When everything is working correctly, the valve remains tightly sealed. However, when system dynamics shift, you will often find your Why Is Water Dripping from a Pressure Relief Valve? to be the primary indicator of an underlying issue. Here is a breakdown of the primary reasons why this safety device starts to leak.
High Water Pressure and Thermal Expansion
Water is an incredibly powerful force, especially when heated. Unlike air, water does not compress when it gets hot; instead, it expands in volume. In an older, “open” plumbing system, this expanding water would simply push back out of your home and into the municipal water main.
However, modern plumbing standards in Northern Utah communities like Salt Lake City, Layton, and Draper require “closed” plumbing systems. These systems utilize backflow preventers or pressure-reducing valves (PRVs) to keep household water from flowing backward. While excellent for public health, a closed system traps the expanding hot water inside your home’s pipes. As your water heater runs through a heating cycle, this thermal expansion can drive the internal pressure past safety limits, causing a healthy T&P valve to drip to relieve the excess strain.
Additionally, standard municipal water pressure should ideally sit between 50 and 70 PSI. Water pressure over 80 PSI is considered high and can cause relief valve leakage, even when the water heater isn’t actively heating. When static pressure is already hovering near the danger zone, the slight pressure spike from thermal expansion easily pushes the T&P valve past its limits. You might notice this more during seasonal transitions; for instance, increased summer household activities (like back-to-back guest showers or extra laundry cycles) can easily lead to these frequent pressure spikes.
Sediment Buildup and Corrosion
Another major culprit behind a pressure release valve dripping is the quality of the water flowing through it. Northern Utah is notorious for having hard water. As water is heated, dissolved minerals like calcium and magnesium solidify, forming a crusty white scale.
Over time, this sediment accumulates at the bottom of your tank and can float up into the T&P valve’s internal seat. If you manually test the valve or if it opens slightly to vent pressure, a tiny flake of mineral scale can get trapped under the valve’s rubber seal. This prevents the valve from closing completely, resulting in a slow, persistent leak. If left unaddressed, this moisture combined with mineral deposits will corrode the spring mechanism, permanently ruining the valve. For a deeper look into how this affects electric models specifically, check out our guide on The Weeping Valve Troubleshooting Your Electric Water Heater’s Pressure Relief Leak.
How to Diagnose a Dripping Pressure Relief Valve
Before you run to the hardware store or call us to replace your water heater, you need to determine whether the valve itself is broken or if it is simply doing its job by venting excess pressure. Replacing a perfectly good T&P valve won’t stop the dripping if your home’s water pressure is soaring to 100 PSI!
To help you narrow down the issue, use our step-by-step diagnostic guide below, which is designed to help you Stop the Drip A Guide to Fixing Your Leaky Water Heater safely and efficiently.
Testing for a Faulty Valve vs. Thermal Expansion
The pattern of the drip is your first major clue.
- Continuous Dripping: If the valve drips constantly, 24 hours a day, regardless of whether the water heater is actively heating, the issue is likely a faulty, corroded valve seat, or your home’s main static water pressure is consistently over 80 PSI.
- Intermittent Dripping: If the valve only drips while the water heater is heating up (such as immediately after a long shower or a load of hot laundry) and then stops once the heating cycle ends, the issue is thermal expansion.
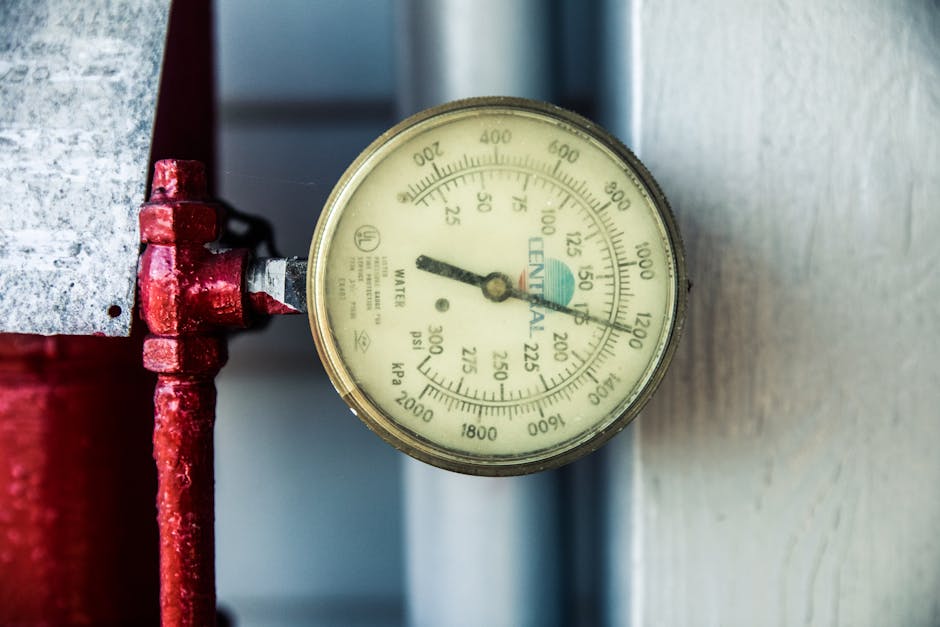
You can verify your household pressure by screwing a simple water pressure gauge with a red “peak recording” indicator needle onto an outside hose spigot or your washing machine’s cold-water faucet. Leave it on for 24 hours. If the red peak needle climbs above 80 PSI, your pressure reducing valve (PRV) has likely failed, or you need to install a thermal expansion tank.
If the pressure is normal but the water coming out of the discharge pipe is steaming hot or boiling, you could be dealing with a dangerous thermostat failure. When a thermostat fails to shut off, the water heater can enter “thermal runaway.” If you suspect this, read about Why Your Gas Water Heater Is Leaking and How to Stop the Flood to learn how to safely handle this emergency.
Checking the Expansion Tank Schrader Valve
If your home has a closed plumbing system, you should have a thermal expansion tank installed on the cold-water inlet line above your water heater. This small tank contains a rubber bladder with pressurized air on one side and water on the other, designed to absorb thermal expansion.
If your expansion tank fails, the T&P valve will immediately start dripping to compensate. Here is how to test it:
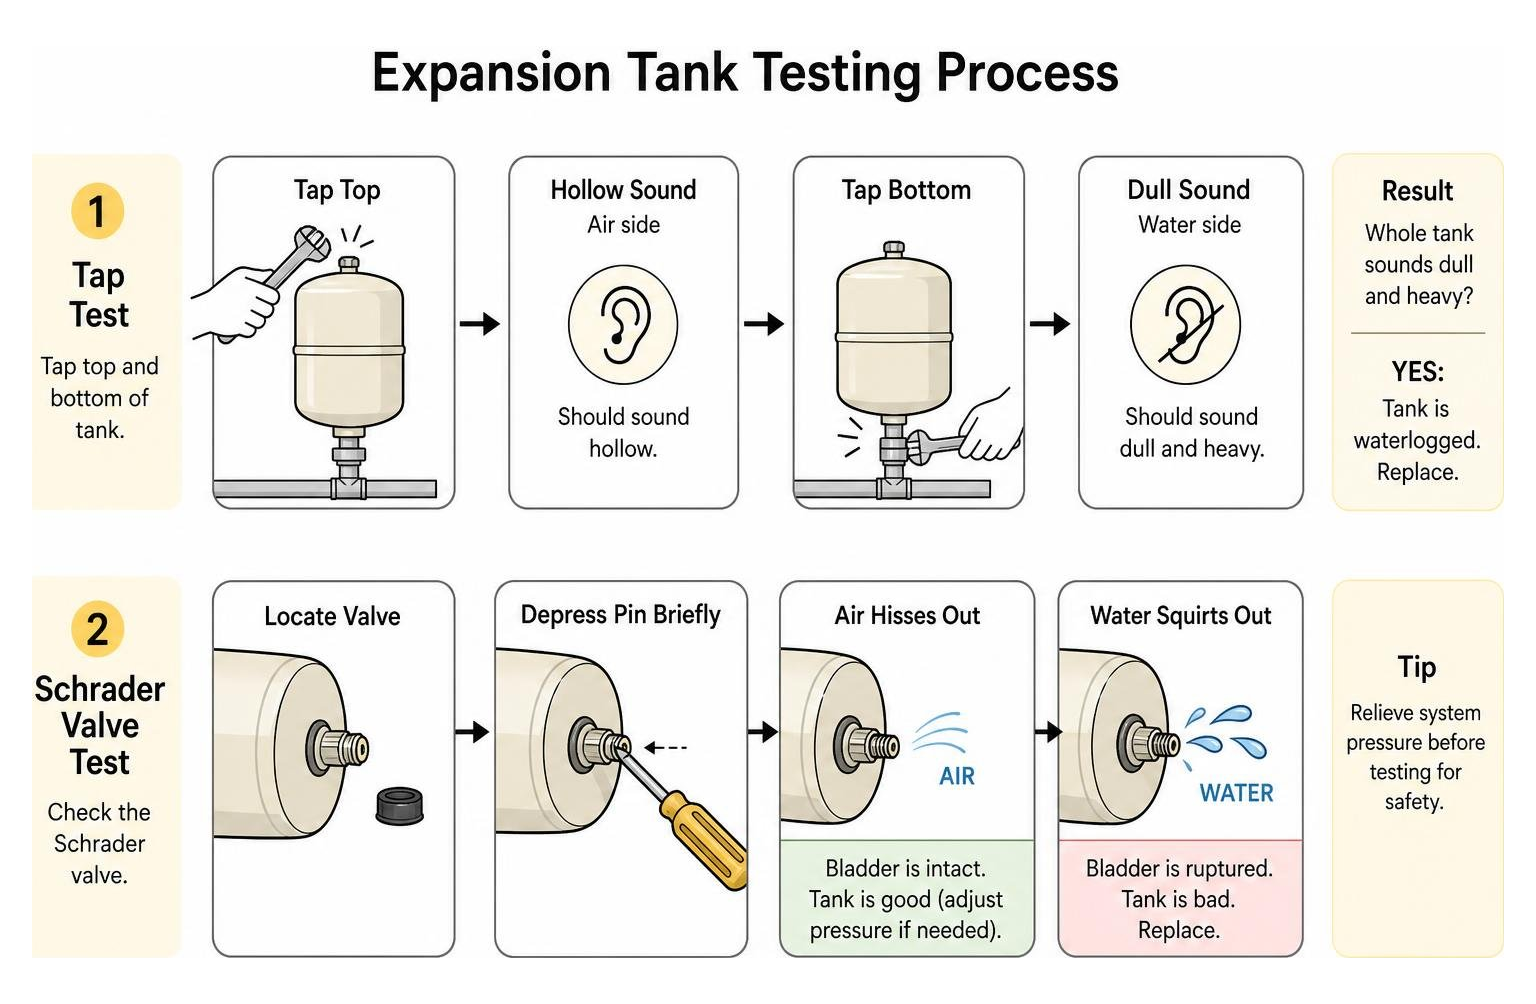
- The Tap Test: Gently tap the top and bottom halves of the expansion tank with a metal wrench or screwdriver. The side connected to the plumbing should sound dull and heavy (filled with water), while the opposite side should sound hollow (filled with air). If the entire tank sounds dull and heavy, it is waterlogged and must be replaced.
- The Schrader Valve Test: Locate the small Schrader valve (which looks exactly like a bicycle tire valve) on the end of the expansion tank. Unscrew the plastic cap and briefly depress the center pin with a small screwdriver.
- If air hisses out, the bladder is still intact (though you may need to adjust the pressure).
- If water squirts out, the internal rubber bladder has ruptured. The tank is ruined and can no longer absorb pressure spikes, which is why your T&P valve is dripping.
Step-by-Step Guide to Fixing a Pressure Release Valve Dripping on Your Water Heater
If your diagnostics point to a faulty T&P valve, replacing it is a straightforward task that many handy homeowners can complete. However, because you are dealing with high temperatures, high pressures, and gas or electricity, safety must be your absolute top priority.
Before you begin, make sure you have the following tools ready:
- A replacement T&P valve (ensure the shank length and thread size match your old valve, usually 3/4-inch NPT)
- Pipe wrench or large adjustable wrench
- Teflon thread sealing tape (PTFE tape)
- A garden hose
- A bucket
- Work gloves and safety glasses
For a complete safety and preparation overview, read through our detailed guide on Fixing a Water Heater Leaking from the Pressure Release Valve: A Step-by-Step Guide .
Safety Steps: Shutting Down Power and Water
Never attempt to remove a T&P valve while the water heater is powered on, hot, or under pressure. Doing so can result in severe scalding or electrical shock.
- Turn Off the Energy Source:
- For electric water heaters, switch off the dedicated circuit breaker in your main electrical panel.
- For gas water heaters, turn the gas control valve knob on the front of the heater to the “OFF” position. If you want to be extra safe, you can also close the manual gas shut-off valve on the incoming gas pipe. For more tips on managing gas models safely, see The Top 7 Gas Water Heater Problems and How to Solve Them.
- Shut Off the Water: Locate the cold-water shut-off valve above the water heater and turn it clockwise until it is completely closed.
- Relieve the Pressure: Open a hot water faucet inside your home (such as in a kitchen or bathroom sink) to relieve the pressure inside the plumbing lines. Leave this faucet open to allow air into the system as you drain the tank.
Replacing the Faulty T&P Valve
Once the system is powered down and the pressure is relieved, you can proceed with the replacement.
- Drain the Water Level: Attach your garden hose to the drain valve at the bottom of the water heater tank and run the other end to a floor drain or outside. Open the drain valve and let the water run until the level drops below the T&P valve port (usually about 2 to 3 gallons is sufficient).
- Remove the Discharge Pipe: Use your pipe wrench to unscrew the vertical discharge pipe attached to the outlet of the T&P valve. Set it aside, as you will need to reinstall it later.
- Remove the Old Valve: Place your wrench on the brass body of the T&P valve and turn it counterclockwise to unscrew it from the tank. Be careful, as a small amount of hot water may spill out.
- Prepare the New Valve: Wrap Teflon tape clockwise 3 to 5 times around the male threads of the new T&P valve. This ensures a watertight seal without over-tightening. If you’re interested in other DIY water heater components, check out our guide on How to Swap Your Water Heater Thermostat Without a Pro.
- Install the New Valve: Thread the new valve into the tank by hand, turning it clockwise. Use your wrench to tighten it until it is snug and the discharge outlet faces directly downward. Do not over-tighten, as you could crack the tank’s internal lining.
- Reattach the Discharge Pipe: Apply Teflon tape to the threads of the discharge pipe and screw it back into the outlet of the new T&P valve.
- Refill and Restart: Turn the cold-water supply valve back on and let the tank fill completely. Keep the indoor hot water faucet open until water flows out in a steady stream with no air bubbles, then turn it off. Check the new valve threads for any signs of leaks. Once verified, restore power or relight your gas pilot light.
Preventing Future Pressure Release Valve Dripping Problems
Once your valve is fixed, you want to keep it that way. Preventing future leaks comes down to routine maintenance and managing your home’s plumbing environment.
To start, it helps to understand how your home’s plumbing configuration affects pressure. Below is a comparison of open versus closed systems:
| System Type | How It Handles Thermal Expansion | Risk of T&P Valve Dripping |
|---|---|---|
| Open System | Expands back into the municipal water main | Low (unless main pressure is high) |
| Closed System | Trapped inside the home; requires an expansion tank | High (if expansion tank fails or is missing) |
By implementing a few simple maintenance habits, you can protect your plumbing system and significantly extend the lifespan of your water heater, which typically lasts 10 to 15 years before needing replacement. For a comprehensive maintenance schedule, consult The Essential Gas Water Heater Maintenance Checklist.
Annual Testing and Maintenance
Plumbing valves are mechanical devices, and like any machine, they need to be exercised to prevent them from seizing up. You should test your T&P valve at least once a year.
To test the valve, place a bucket under the discharge pipe and gently lift the metal test lever. Water should rush out of the pipe. Release the lever; the valve should snap shut immediately and stop the flow of water completely.
Note: In older water heaters with heavy sediment buildup, manually testing a valve can sometimes cause it to start dripping because mineral flakes get dislodged and stuck in the seat. This is sometimes called “Monday morning syndrome.” However, it is always better to find out your valve is failing during a controlled test than during a system emergency!
For specialized industrial systems, technicians refer to instructions like the Instructions and Operations Manual for SPR-Series Manual Pressure Relief Valve to calibrate spring-loaded mechanics. While residential water heaters use pre-set, non-adjustable valves, the core principle remains the same: regular testing prevents mechanical failure.
In fact, the importance of valve maintenance spans across many household items. According to a 2025 survey by the Pressure Cooking Manufacturers Association, improper valve maintenance accounts for nearly 70% of reported pressure loss issues in household pressure cookers. Similarly, a 2025 survey of Instant Pot owners found starch buildup caused 68% of valve issues. If you want to keep all your household valves running smoothly, you can read the Ultimate Pressure Cooker Steam Relea… | Instant Pot Basics to see how sediment and debris affect smaller appliances in similar ways.
Installing a Thermal Expansion Tank
If your home has a closed plumbing system, installing a thermal expansion tank is the single best way to protect your water heater and prevent your T&P valve from dripping.
When installing an expansion tank, size it correctly based on your water heater’s capacity (typically a 2-gallon tank for water heaters up to 50 gallons, and a 4.5-gallon tank for heaters up to 80 gallons). Crucially, you must adjust the tank’s air pre-charge pressure using a hand pump to match your home’s static water pressure before connecting it to the water lines. If the tank comes pre-charged to 40 PSI but your home’s pressure is 70 PSI, its effective capacity will be reduced by up to 50%. Learn more about how to resolve this Common Water Heater Problem.
Frequently Asked Questions about Leaking T&P Valves
Is a dripping pressure relief valve dangerous?
Yes, a dripping T&P valve can be a sign of a highly dangerous situation. While a slow drip caused by minor thermal expansion is mostly a threat to your drywall and flooring, a valve that is actively gushing or blowing steam indicates a critical safety failure.
If your water heater’s thermostat fails and remains stuck in the “ON” position, the water can reach boiling temperatures, creating extreme pressure. If the T&P valve is blocked, capped, or fails to open, the tank can suffer a Boiling Liquid Expanding Vapor Explosion (BLEVE), which can literally launch the water heater through your roof like a rocket. If you notice steaming water or a whistling sound, shut off the power and water immediately and call a professional. For other critical component troubleshooting, see our guide on Fix Your Hot Water The Ultimate Guide to Thermocouple Replacement.
What is the difference between a T&P valve and a drain valve?
The T&P valve is an automatic safety device located near the top or upper side of the water heater tank. It is designed to open on its own to relieve excess temperature and pressure.
The drain valve is a manual faucet located at the very bottom of the water heater tank. It is used by homeowners or plumbers to attach a garden hose and flush sediment out of the tank during routine maintenance.
Can I just tighten the valve to stop the leak?
No. Never attempt to tighten or plug a leaking T&P valve to stop a drip. If the leak is coming from the internal seal, tightening the valve body into the tank will not stop the internal drip and may damage the tank’s threads. Capping or plugging the discharge pipe is a severe plumbing code violation and disables a vital safety feature, putting your home at risk of a catastrophic explosion.
Conclusion
A pressure release valve dripping is a clear warning sign that your water heater is experiencing high pressure, excessive temperature, sediment fouling, or a failed safety mechanism. While some diagnostic steps and replacements can be handled as a weekend DIY project, working with pressurized hot water always carries inherent risks.
If you are uncomfortable diagnosing thermal expansion, testing your home’s water pressure, or replacing plumbing components yourself, don’t leave your home’s safety to chance.
At Honest Home Services, we provide professional, transparent, and affordable plumbing repairs across Northern Utah, including Salt Lake City, Layton, Bountiful, and West Jordan. Our local, expert technicians are dedicated to ensuring your water heater operates safely and efficiently.
Contact us today to schedule your professional Salt Lake City Water Heater Repair and get the peace of mind you deserve!