
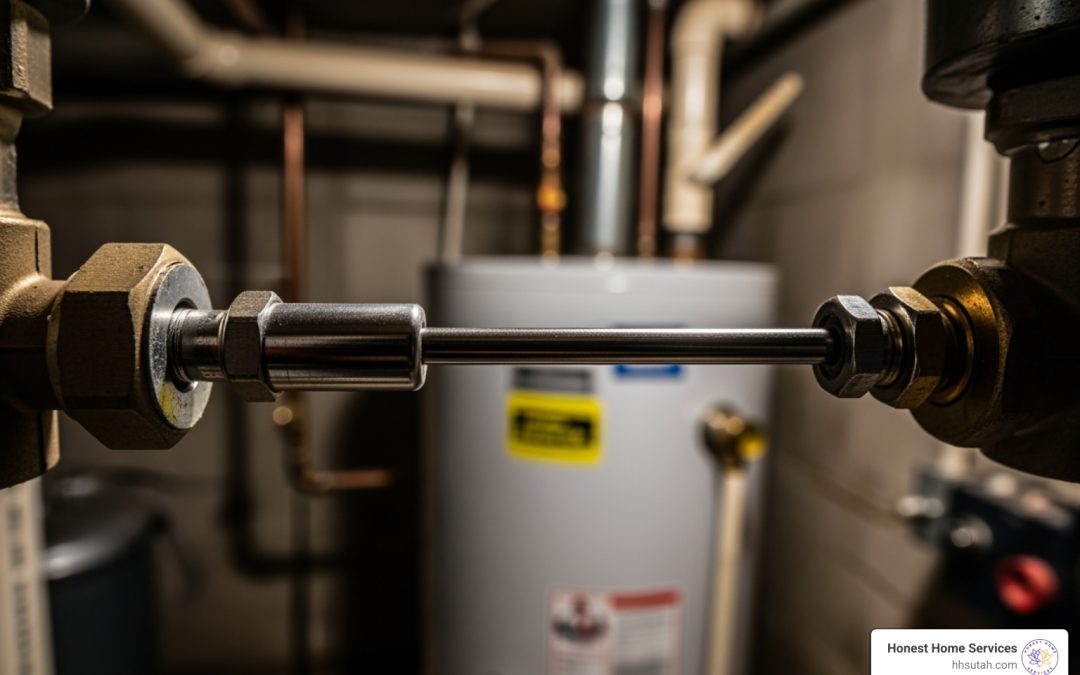
Why a Faulty Thermocouple Means No Hot Water
Thermocouple replacement water heater issues are one of the most common reasons homeowners suddenly find themselves without hot water. If your gas water heater’s pilot light won’t stay lit, or you’re constantly relighting it only to have it go out again, a faulty thermocouple is likely the culprit.
Quick Answer: What You Need to Know
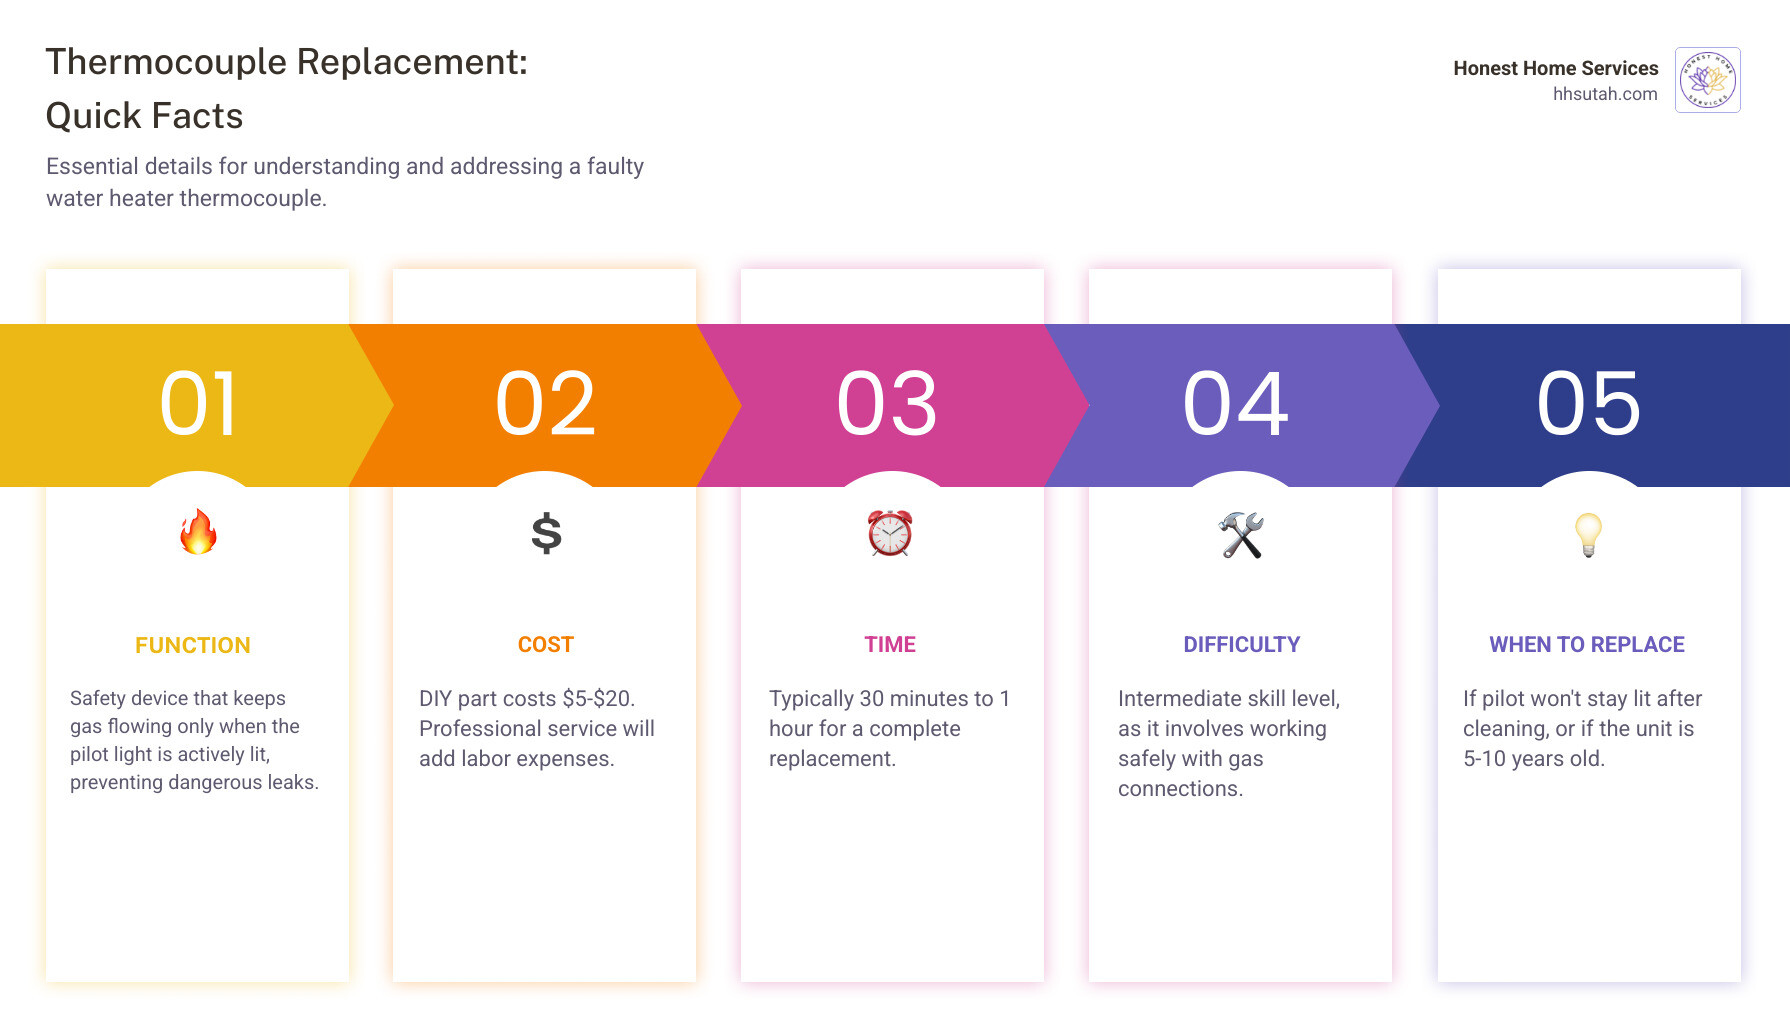
- The Problem: Thermocouple keeps gas flowing only when pilot is lit
- The Cost: DIY costs $5-$20 for the part; professional service adds labor
- The Time: 30 minutes to 1 hour for replacement
- The Difficulty: Intermediate skill level – requires working with gas connections
- When to Replace: Pilot won’t stay lit after cleaning, or thermocouple is 5-10 years old
A thermocouple is a small safety device that sits in your water heater’s pilot flame. When heated, it generates about 25 to 30 millivolts of electricity – just enough to signal the gas control valve to stay open. If the pilot goes out, the thermocouple cools down and stops generating electricity, which tells the gas valve to shut off immediately. This prevents dangerous gas leaks in your home.
Signs you need replacement:
- Pilot light goes out when you release the control knob
- Water heater won’t produce hot water
- You smell gas near the water heater
- Pilot flame is yellow or orange instead of blue
- Frequent relighting is needed
At Honest Home Services, we’ve completed thousands of thermocouple replacement water heater repairs across Northern Utah over our 20+ years in business. We know that understanding this simple but critical component can save you money and restore your hot water quickly.
Is Your Thermocouple Faulty? Diagnosis and First Steps
Nothing ruins a morning quite like stepping into a cold shower. If your gas water heater is acting up, especially with issues related to the pilot light, a failing thermocouple is often the prime suspect. It’s one of the Common Water Heater Problems we see regularly in Salt Lake City and across Northern Utah.
Signs You Need a Thermocouple Replacement Water Heater Service
How do you know if your water heater’s thermocouple is crying for help? Here are the tell-tale signs:
- Pilot Light Extinguishes When You Release the Control Knob: This is the most classic symptom. You can light the pilot, but as soon as you let go of the button on the gas control valve, the flame goes out. This means the thermocouple isn’t generating enough electricity to keep the gas valve open, which is its primary job.
- No Hot Water (or Intermittent Hot Water): If your water heater isn’t producing hot water at all, or the hot water supply is inconsistent, a failing thermocouple could be preventing the main burner from igniting. Without a lit pilot light, the main burner won’t receive gas.
- Frequent Relighting Needed: Are you constantly heading to the basement or utility closet to relight your pilot light? This indicates a thermocouple that’s on its way out, struggling to maintain the electrical current needed to keep the gas flowing.
- Yellow or Orange Pilot Flame: A healthy pilot flame should be a strong, steady blue. If you observe a yellow or orange flame, it signals incomplete combustion. This can lead to soot buildup, which can block the thermocouple’s ability to sense the flame effectively. More alarmingly, A yellow or orange pilot light indicates incomplete combustion, which can produce dangerous carbon monoxide. If you see this, address it promptly!
- Sooty Buildup Around the Pilot Assembly: Incomplete combustion, often indicated by a yellow flame, can also leave behind black, sooty deposits. This buildup can insulate the thermocouple, preventing it from heating sufficiently and doing its job.
- Water Heater Age: Thermocouples don’t last forever. If your Water heater is more than 10 years old, the thermocouple might simply be worn out from years of service. Over time, the metals inside can degrade, making them less effective at generating that crucial electrical current.
Any of these signs suggest it’s time to consider a thermocouple replacement water heater repair.
Cleaning vs. Replacing a Thermocouple
Sometimes, your thermocouple just needs a little TLC, not a full replacement. So, how do you decide?
- When to Clean: If the pilot light issue is new, and you notice soot or debris on the thermocouple, a good cleaning might be all it needs. Gently cleaning the tip of the thermocouple with fine steel wool or very fine sandpaper can remove the insulating grime and restore its function. Wipe away any debris with a clean, dry cloth afterward. For a detailed guide, check out How to clean a thermocouple. This is often a good first step before jumping to replacement.
- When to Replace:
- Age: Thermocouples typically last 5-10 years with proper maintenance. If yours is approaching or beyond this age, especially if your water heater is more than 10 years old, replacement is often the more reliable solution.
- Physical Damage: If the thermocouple itself looks bent, corroded, or otherwise physically damaged, cleaning won’t help. It’s time for a new one.
- Multiple Cleaning Attempts Fail: If you’ve cleaned the thermocouple, ensured proper positioning, and the pilot light still won’t stay lit, it’s a strong indicator that the internal components have failed, and replacement is necessary.
- Cost-Benefit: Given the low cost of a new thermocouple, if cleaning doesn’t immediately resolve the issue, replacement is usually the next logical step before calling in a professional for deeper diagnostics.
Cost of a Thermocouple Replacement
One of the silver linings of a faulty thermocouple is that it’s typically one of the most affordable water heater repairs.
- DIY Cost: A new thermocouple is surprisingly inexpensive. You can usually find a replacement part at your local hardware store in Salt Lake City or any home center for between $5 and $20. This makes it a very budget-friendly DIY project if you’re comfortable working with gas appliances.
- Professional Installation Cost: While the part itself is cheap, professional installation will include labor costs. A plumber or HVAC technician from Honest Home Services will charge for their time, expertise, and the convenience of coming to your home, diagnosing the issue, and safely installing the new part. While we can’t give an exact quote without seeing your specific situation, the overall Hot Water Repair Cost for a thermocouple replacement is generally on the lower end compared to other water heater repairs. It’s a small price to pay for restored hot water and peace of mind!
Your Step-by-Step Guide to Thermocouple Replacement Water Heater Repair
Ready to tackle this common water heater repair yourself? We’ve put together a comprehensive guide to help you through the process. Working with gas appliances requires caution. If you ever feel unsure or uncomfortable, don’t hesitate to call the experts at Honest Home Services for professional Water Heater Repair in Northern Utah.
Step 1: Gather Tools and Materials
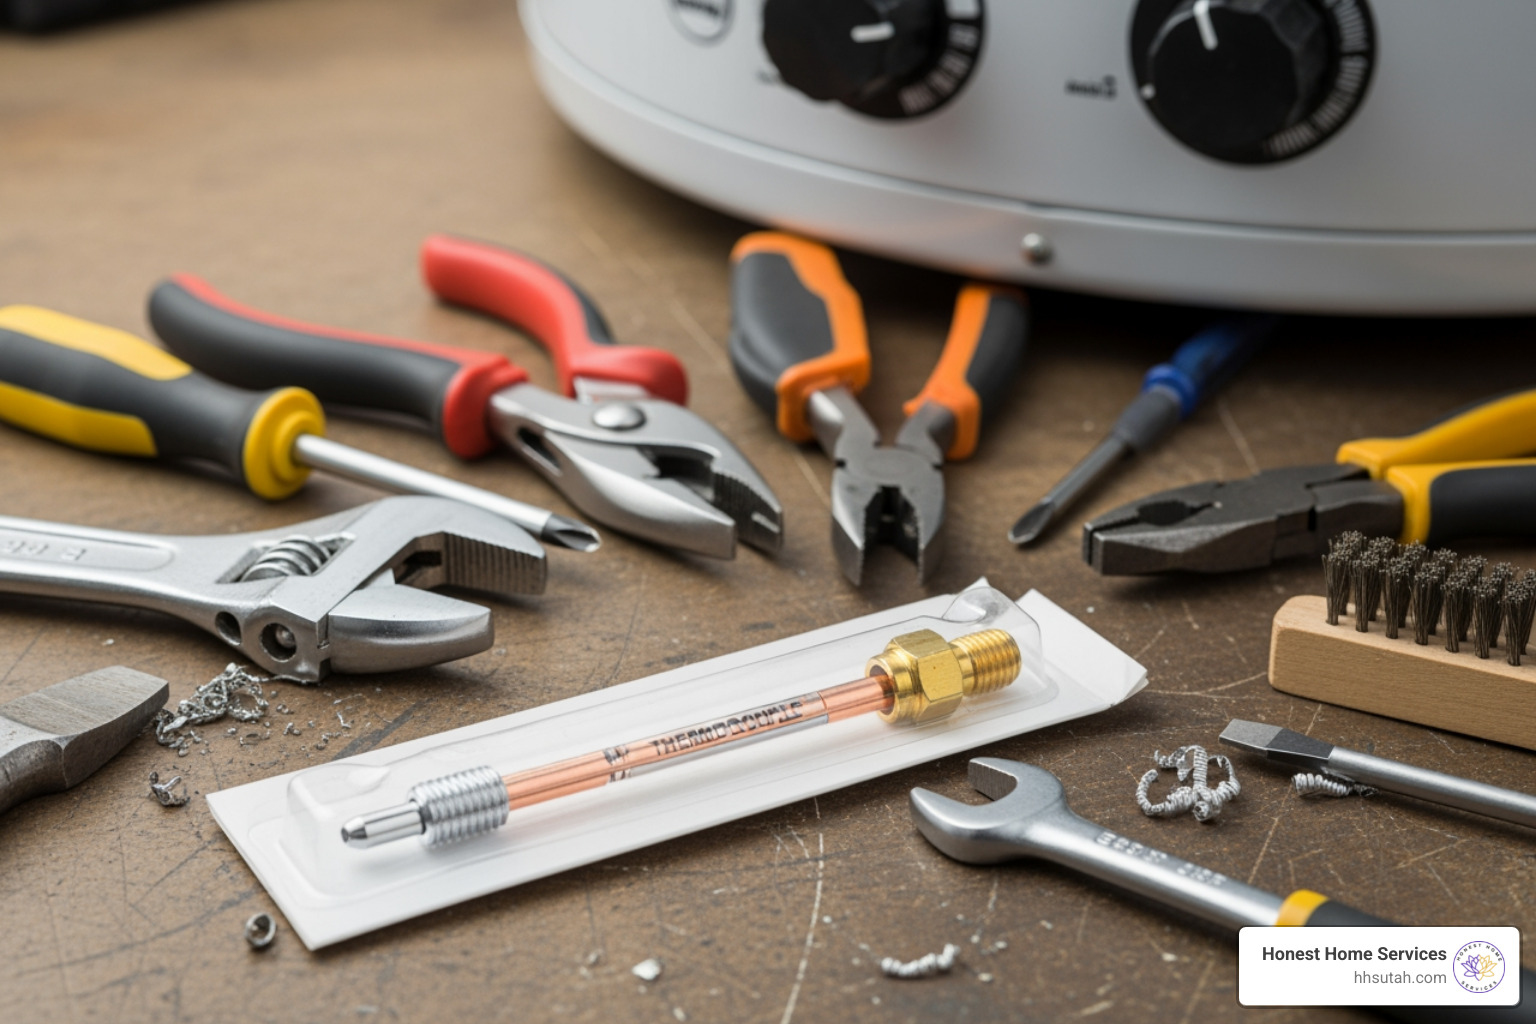
Having everything you need on hand before you start will make the job much smoother.
- New Thermocouple: Take your old thermocouple to the store to ensure you get an exact match for length and fittings. Universal thermocouples are also available and often work for many models.
- Adjustable Wrenches and/or Open-End Wrenches: You’ll likely need a 7/16-inch wrench for the thermocouple and pilot tube connections, and possibly a larger one (like a 3/4-inch) for other gas lines.
- Nut Driver or Socket Set: A 1/4-inch nut driver or socket might be needed for screws on the burner assembly or access panels.
- Screwdrivers: Both flathead and Phillips head screwdrivers may be required.
- Wire Brush or Fine Sandpaper: Useful if you need to clean any corrosion from connections or the pilot assembly.
- Rags or Towels: For cleaning and wiping.
- Soapy Water Solution: A small spray bottle filled with dish soap and water is essential for testing gas leaks.
- Flashlight or Headlamp: The burner compartment can be dark.
- Bucket or Shop Vac: To clean any dust or debris from the burner compartment.
Step 2: Safety First – Shut Off the Gas
This is the most critical step. Working with gas lines can be dangerous, so never skip or rush this part.
- Turn Off the Gas Supply: Locate the gas control knob on your water heater. Depress and hold the lock tab (usually found underneath the knob), then rotate the knob clockwise until it aligns with the “OFF” position.
- Shut Off the Manual Gas Valve: Find the manual gas shut-off valve on the gas line leading to your water heater. This is typically a lever-style valve that should be perpendicular to the gas line when closed. Turn it off.
- Allow to Cool: Give your water heater at least 10-15 minutes to cool down before proceeding. This prevents accidental burns.
- Ensure Ventilation: Make sure the area around your water heater is well-ventilated. If you ever smell gas, ventilate the area immediately and call a professional. A dangerous gas leak can be extremely hazardous.
Step 3: Access and Remove the Burner Assembly
Now that the gas is off and the unit is cool, you can access the thermocouple.
- Remove Access Panels: You’ll typically need to remove an outer metal door and an inner manifold door or access plate to get to the burner compartment. These are usually held in place by screws or clips.
- Locate Components: Inside, you’ll see the gas control valve, the main burner assembly, the pilot light assembly, and the thermocouple. The thermocouple is usually a thin copper or metallic tube running from the pilot assembly to the gas control valve.
- Disconnect Gas Tubes from the Gas Control Valve: Using your wrenches, carefully disconnect the three lines connected to the gas control valve:
- The main gas line to the burner.
- The pilot tube (a thinner metal tube).
- The thermocouple lead (often has a larger nut and may use a left-hand thread – meaning you turn it clockwise to loosen!). Pay close attention to the direction you turn.
- Remove the Burner Assembly: Once the lines are disconnected, you can usually slide or unclip the entire burner assembly from the combustion chamber. Some models may have a holding tab you need to disengage. It’s often easier to work on the thermocouple when the entire assembly is removed. Take this opportunity to vacuum out any dust or debris from the burner compartment.
Step 4: Remove the Old Thermocouple
With the burner assembly out, removing the old thermocouple is straightforward.
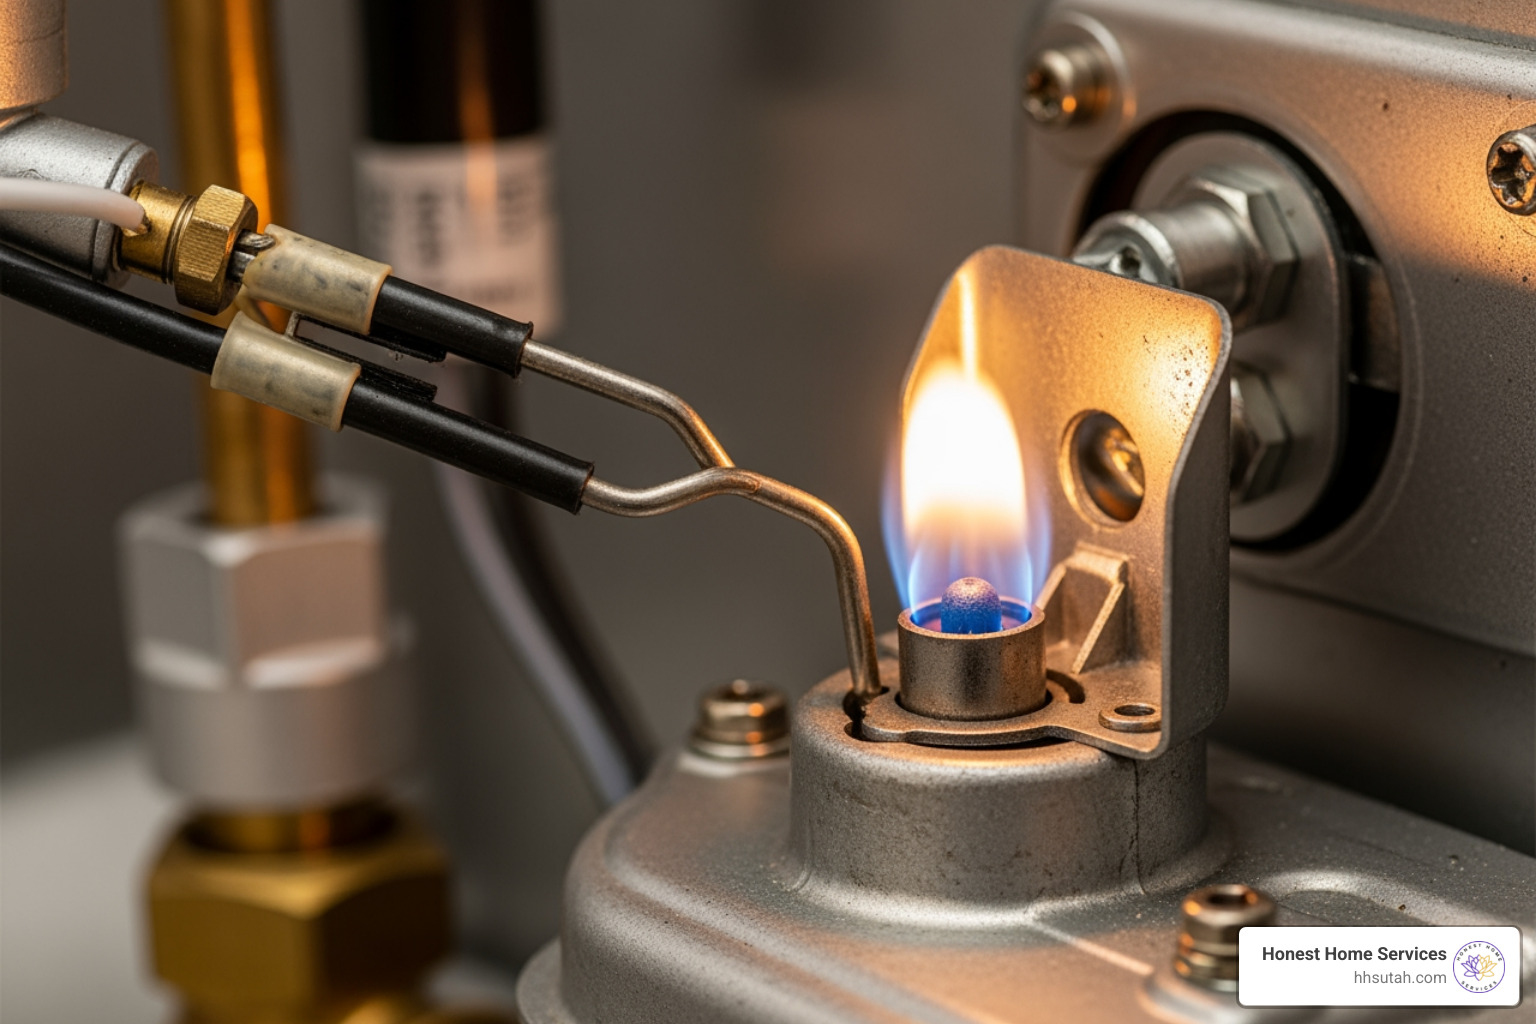
- Locate the Thermocouple on the Pilot Assembly: The thermocouple runs alongside the pilot tube and is typically held in place by a small clip or bracket near the pilot flame.
- Unclip and Remove: Gently unclip or unsnap the thermocouple from its holder on the pilot bracket.
- Pull Out the Old Thermocouple: Carefully pull the thermocouple out from the rear of the pilot assembly.
- Inspect and Match: Take your old thermocouple with you to the hardware store. This ensures you get the correct length and fitting type for your water heater model. While many are universal, matching the old one is the safest bet.
Step 5: Install the New Thermocouple
Installing the new thermocouple is essentially the reverse of removal, but with extra attention to detail.
- Insert New Thermocouple: Carefully feed the tip of the new thermocouple into the hole on the pilot assembly. Push it completely forward until it’s seated firmly against the pilot assembly bracket. You might hear a satisfying “click” when it’s fully in place.
- Position Correctly: This is crucial! The tip of the thermocouple must be positioned correctly so that the top 3/8 to 1/2 inch is fully enveloped by the pilot flame. If it’s too far away or not enough of it is in the flame, it won’t heat sufficiently to generate the necessary millivolts.
- Re-clip and Secure: Snap the thermocouple back into its clip, securing it alongside the pilot tube.
- Reinstall Burner Assembly: Carefully slide the burner assembly back into the combustion chamber, ensuring it’s properly seated and any holding tabs are re-engaged.
Step 6: Reconnect and Test for Leaks
This final step is paramount for safety. Do not skip it!
- Reconnect Tubes to Gas Valve: Reattach the main gas line, the pilot tube, and the thermocouple lead to their respective ports on the gas control valve.
- Tighten Connections: Hand-tighten all nuts first to ensure you don’t cross-thread them. Then, use your wrenches to tighten them an additional quarter turn. Do not overtighten, as this can strip threads or damage the connections, leading to leaks.
- Turn Gas Supply On: Slowly turn the manual gas shut-off valve back to the “ON” position (parallel to the gas line).
- Relight Pilot: Follow the specific instructions printed on your water heater for relighting the pilot. This usually involves holding down the pilot button, lighting the pilot flame, and continuing to hold the button for about 30-60 seconds until the thermocouple heats up and holds the pilot flame on its own.
- Test for Leaks: Once the pilot is lit and the main burner has fired up (you’ll hear it roar and see a larger flame), it’s time to check for leaks. Spray your soapy water solution generously over all the gas connections you tightened – the thermocouple, pilot tube, and main gas line at the control valve.
- Look for Bubbles: If you see any bubbles forming, that indicates a gas leak. Immediately shut off the gas supply, tighten the fitting where the bubbles appeared, and retest.
- Address Leaks: If you cannot stop a leak after tightening, or if you smell gas at any point, shut off the gas immediately, ventilate the area, and call Honest Home Services for emergency service. We’re here for your Broken Water Heater and gas concerns in Northern Utah.
Once you’ve confirmed there are no leaks, replace the access panels, and your hot water should be back in business!
When DIY Isn’t the Answer: Know When to Call a Pro
While a thermocouple replacement water heater repair can be a rewarding DIY project, it’s not for everyone, and sometimes professional help is essential.
- Safety Risks: Working with gas appliances carries inherent risks. If you’re uncomfortable, inexperienced, or unsure about any step, please call a professional. Gas leaks can be extremely dangerous.
- Persistent Gas Smell: If you smell gas at any point during the process, or after you’ve completed the repair, immediately shut off the gas, open windows and doors, evacuate your home, and call us. Do not try to find the leak yourself with an open flame!
- Complex Issues: Sometimes, a faulty thermocouple is a symptom, not the root cause. If the pilot light still won’t stay lit after a new thermocouple is installed, or if you suspect other issues like a faulty gas control valve, a clogged pilot orifice, or problems with the main burner, it’s time to call in the experts.
- Replacement Doesn’t Work: If you’ve followed all the steps and your water heater still isn’t working correctly, our local, expert technicians can diagnose the problem quickly and efficiently. We handle all kinds of Handling Water Heater Repairs: Who to Call for the Job and offer Emergency Water Heater Repairs across Salt Lake City, Davis County, and surrounding areas.
We believe in honest service, and sometimes that means advising you when to step back and let the professionals handle it.
Frequently Asked Questions about Water Heater Thermocouples
We hear a lot of questions about thermocouples. Here are some of the most common ones:
How long should a water heater thermocouple last?
A thermocouple typically lasts 5-10 years with proper maintenance. However, its lifespan can vary based on factors like water heater usage, the environment (e.g., dusty utility rooms), and the quality of the part. If your water heater is nearing or past its typical 8-12 year lifespan, and the thermocouple is failing, it might be a sign that other components are also wearing out, making replacement of the entire unit a consideration.
Is a yellow pilot light dangerous?
Yes, a yellow or orange pilot light is dangerous and should be addressed immediately. A healthy pilot flame should be blue. A yellow or orange flame indicates incomplete combustion, which can produce carbon monoxide—a dangerous, odorless gas. This color change often means the pilot assembly and thermocouple need cleaning, or there’s not enough air getting to the flame. If you see a yellow flame, clean the assembly, ensure good airflow, and if the problem persists, call a professional.
How is a thermocouple different from a flame sensor?
While both serve a similar safety function, they operate differently and are found in different types of gas water heaters:
- Thermocouple: Found in older gas water heaters with a standing pilot light. It’s a thermoelectric device that generates a small electrical current (about 25-30 millivolts) when heated by the pilot flame. This current keeps the gas valve open. If the pilot goes out, the thermocouple cools, the current stops, and the gas valve closes.
- Flame Sensor (or Flame Rod): Typically found in newer water heaters with electronic ignition systems (which don’t have a continuously burning pilot light). Instead of generating voltage, a flame sensor uses the flame to complete an electrical circuit. It sends a signal back to the control board to indicate the presence of a flame. If no flame is detected, the gas valve is shut off.
- Thermopile: Another variation, a thermopile is essentially a bundle of multiple thermocouples connected in series. It generates a much higher voltage (around 750 millivolts) and is often used in appliances that require a stronger signal to the gas valve or in systems that need to power other components.
Modern water heaters are increasingly moving towards electronic ignition systems, eliminating the need for a continuously burning pilot light and its associated thermocouple, offering improved energy efficiency and safety.
Keep Your Hot Water Flowing
A working water heater is essential for comfort and hygiene in any Northern Utah home. While a thermocouple replacement water heater repair is often a straightforward fix, it’s a critical one that directly impacts your safety and hot water supply.
Whether you’re a seasoned DIYer or prefer to leave gas appliance repairs to the experts, we hope this guide has empowered you with the knowledge to understand your water heater better. If you find yourself facing a stubborn pilot light or any other water heater woes in Salt Lake City, Layton, Kaysville, or anywhere else in Northern Utah, Honest Home Services is just a call away. Our local, expert technicians are committed to providing honest, reliable, and affordable Salt Lake City Water Heater Repair and guaranteed customer satisfaction. Don’t let a small part keep you in the cold – let us help you get your hot water flowing again!