

When Your Hot Water Runs Out: What You Need to Know About Element Replacement
Hot water cylinder element replacement is one of the most common — and most fixable — water heater repairs a homeowner can face. Before diving into the full guide, here’s the short answer:
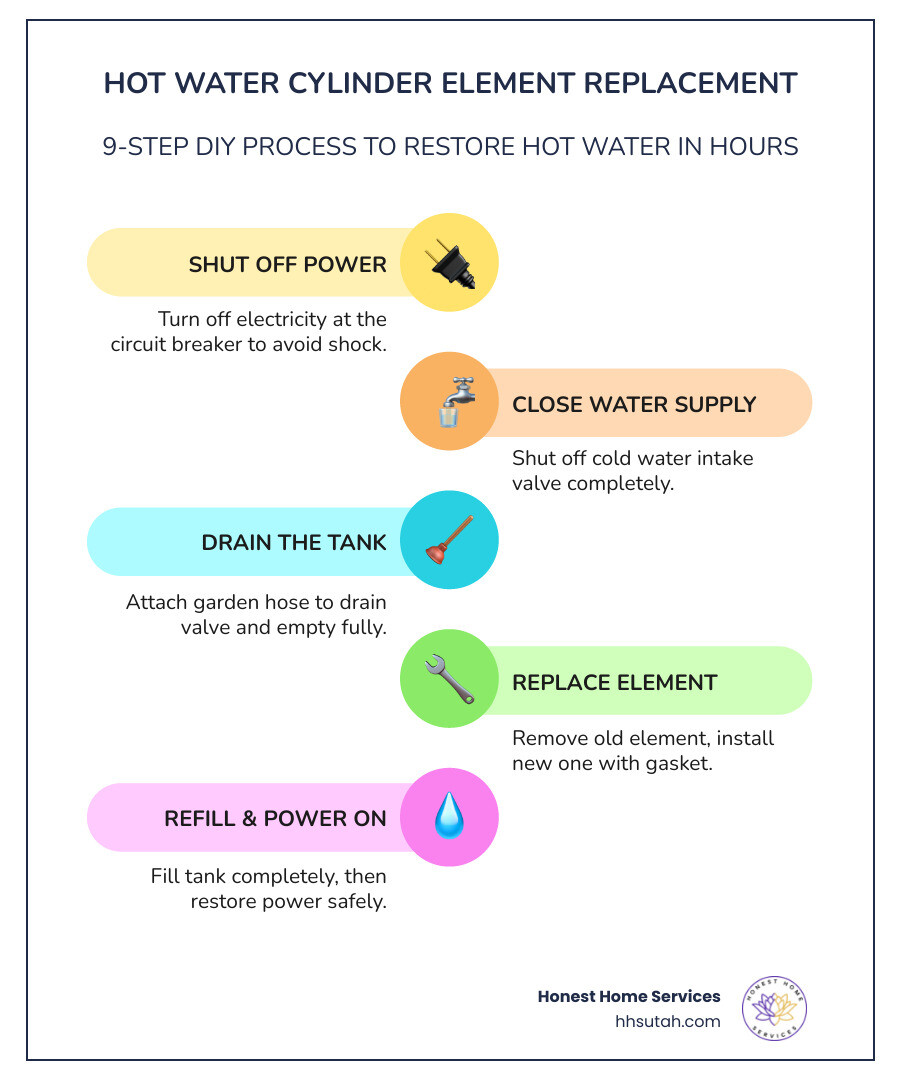
How to replace a hot water cylinder element (quick overview):
- Turn off power at the circuit breaker
- Shut off the cold water supply
- Drain the cylinder using a garden hose
- Remove the access panel and disconnect the wires
- Unscrew and remove the old element
- Install the new element with a fresh gasket
- Reconnect the wires
- Refill the tank completely
- Restore power only after the tank is full
Picture this: you step into the shower on a cold Utah morning, and instead of warm water, you get an icy blast. That jolt is often the first sign that your heating element has given out — and it’s more common than most people think.
The good news? A failed element doesn’t mean you need a whole new water heater. In most cases, the fix is straightforward, affordable, and can be done in a few hours. DIY replacement typically costs just $10 to $60 in parts, compared to $200 to $300 for a professional visit.
This guide walks you through the entire process — safely and clearly — so you know exactly what you’re doing before you pick up a wrench.
At Honest Home Services, we’ve spent over 20 years helping Northern Utah homeowners and businesses with water heater repairs, including countless hot water cylinder element replacements across the Salt Lake City area. Whether you’re tackling this yourself or need a trusted hand, we’re here to help you get your hot water back fast.
Explore more about hot water cylinder element replacement:
Signs and Testing for Failure
Before you start tearing things apart, you need to be sure the element is actually the culprit. Sometimes, a Common Water Heater Problem like a tripped reset button or a faulty thermostat can mimic a dead element.
Testing is the only way to avoid buying parts you don’t need. According to research, heating elements typically last 10 to 15 years in standard tank heaters, but Utah’s hard water can sometimes shorten that lifespan. If your unit is approaching its tenth birthday in April 2026, a failure isn’t just possible—it’s likely.
Signs You Need a Hot Water Cylinder Element Replacement
How do you know if your element is waving the white flag? There are a few tell-tale symptoms that Why Your Water Heater Is Giving You The Cold Shoulder:
- Lukewarm Water: If your water never gets truly hot, one of the two elements (usually the upper one) might have failed.
- Running Out Quickly: If you have hot water for five minutes and then it goes cold, your lower element is likely dead. The upper element heats the top of the tank, but without the bottom one, you lose the bulk of your hot water capacity.
- Tripped Circuit Breaker: A shorted element can cause the breaker to flip repeatedly. If you reset the breaker and it pops again immediately, stop—you have a short.
- Strange Noises: Popping, hissing, or rumbling sounds often indicate sediment buildup on the element. This sediment acts as “reverse insulation,” forcing the element to overheat and eventually burn out.

Testing for Hot Water Cylinder Element Replacement
To Fix Broken Water Heater Issues Like A Pro, you’ll need a multimeter. This tool tells you if the electrical path (continuity) inside the element is still intact.
- Isolate the Power: Go to your breaker panel and turn off the circuit for the water heater. Use a non-contact voltage tester at the water heater to verify there is absolutely no power running to the unit. Safety first!
- Access the Element: Remove the side access panel and pull back the insulation.
- Disconnect Wires: Loosen the screws on the element terminals and pull the two wires away.
- The Continuity Test: Set your multimeter to the lowest Ohms (Ω) setting. Touch one probe to each screw terminal on the element.
- A good element will usually read between 10 and 30 ohms.
- A bad element will show “0” (shorted) or “Infinity/OL” (broken circuit).
- The Ground Test: Touch one probe to a screw terminal and the other to the metal tank itself. If you get any reading at all, the element is “grounded” and must be replaced immediately.
For a deeper dive into diagnostics, check out this How to replace an electric water heater heating element guide.
Safety and Preparation
Once you’ve confirmed the failure, it’s time to prep. You can’t just unscrew an element while the tank is full, or you’ll turn your utility closet into a swimming pool. Preparation is key to Stop The Drip A Guide To Fixing Your Leaky Water Heater.
Tools for Hot Water Cylinder Element Replacement
You don’t need a specialized degree to do this, but you do need the right gear. To Everything You Need To Know About New Water Heaters, gather the following:
- Element Wrench: This is a cheap, thin-walled 1-1/2 inch socket designed specifically to fit into the cramped space of the access panel.
- Screwdriver: Usually a Phillips or flat-head for the access panels and wire terminals.
- Garden Hose: For draining the tank.
- Multimeter: For the testing we just discussed.
- Work Gloves and Rags: To protect your hands and clean up small spills.
- Replacement Element and Gasket: Ensure you have the correct wattage and voltage (more on this below).
Draining the Cylinder Safely
Draining the tank is often the most time-consuming part of a hot water cylinder element replacement. Here is What To Do When Your Water Heater Quits On You:
- Cool the Water: If you can, run the hot water in a tub for a few minutes to lower the temperature in the tank. This prevents scalding if a splash occurs.
- Shut off Water: Close the cold water intake valve (usually located on top of the heater).
- Attach the Hose: Connect a garden hose to the drain valve at the bottom of the tank. Run the other end to a floor drain or outside.
- Open a Faucet: Open a hot water faucet somewhere in the house (like a kitchen sink). This breaks the vacuum and allows the water to flow out of the tank freely.
- Open the Drain Valve: Turn the valve handle. If the water doesn’t flow, it might be clogged with sediment.
- Pro Tip: If it’s clogged, try briefly turning the cold water supply back on to “blast” the sediment loose, then shut it off again.

Note: You only need to drain the water level below the element you are replacing. If you’re only swapping the top element, you only need to drain about 1/3 of the tank. For the bottom element, you’ll need to drain it almost completely.
Step-by-Step Hot Water Cylinder Element Replacement
Now for the main event. With the power off and the water drained, you’re ready for the physical swap. This is the core of Fixing The Flow What To Do When Your Hot Water Heater Needs Repair.
Removing the Old Element
- Double-Check Power: Use your tester one last time. We can’t stress this enough!
- Clear the Area: Ensure the wires are tucked back so they don’t get snagged.
- Unscrew the Element: Use your element wrench. Turn it counter-clockwise. These can be stubborn! If it’s stuck, you might need a long screwdriver or a pry bar through the holes of the element wrench for extra leverage.
- Pull it Out: Once unscrewed, pull the element straight out. Be prepared for a small amount of “dribble” water.
- Inspect and Clean: Look at the opening. If there’s a lot of gunk or rust on the threads, wipe them clean with a rag. Ensure the old rubber gasket came out with the element; if it’s stuck to the tank, peel it off.
If the element is jammed or the tank threads are stripped, it might be time for Handling Water Heater Repairs Who To Call For The Job. In places like Layton or Bountiful, our technicians see this often with older units.
Installing the New Element and Gasket
- Prep the New Element: Slide the new rubber gasket onto the base of the element. Some experts suggest a tiny drop of dish soap on the gasket to help it seat perfectly without bunching up.
- Insert and Hand-Tighten: Slide the element into the tank and turn it clockwise by hand. You want to make sure you don’t cross-thread it.
- Snug it Down: Use the element wrench to tighten it. You want it snug enough to compress the gasket, but don’t go “Hulk” on it—over-tightening can damage the gasket and cause a leak.
- Reconnect Wires: Attach the two wires to the screw terminals. It doesn’t matter which wire goes to which screw on a standard element, but make sure the connections are very tight.
- The Weeping Check: Before you put the covers back on, you need to check for leaks. This is vital for The Weeping Valve Troubleshooting Your Electric Water Heaters Pressure Relief Leak.
Selecting the Correct Replacement Element
You can’t just grab any element off the shelf. You need to match the specifications of your specific water heater. Most residential units in Northern Utah use 240-volt systems, but the wattage can vary.
Matching Specifications and Brands
Check the “Data Plate” on the side of your water heater. It will list the required Voltage and Wattage.
| Element Type | Common Use Case | Pros |
|---|---|---|
| Straight (Hairpin) | Standard residential tanks | Affordable, easy to find. |
| Foldback | High-efficiency / Tall tanks | Larger surface area; heats faster. |
| Heavy-Duty Foldback | Hard water areas (SLC/Davis) | Often coated in Titanium or Incoloy; resists scale. |
Key Specs to Watch For:
- Wattage: Most standard elements are 4500W. Never install a higher wattage element than your tank is rated for (e.g., don’t put a 5500W element in a 4500W tank), as this can melt wires or trip breakers.
- Voltage: Ensure it’s 240V. Commercial buildings sometimes use 208V.
- Material: If you live in a hard water area like West Jordan or South Jordan, consider a low-watt density titanium element. These are designed to last longer against mineral buildup.
Understanding these specs helps you manage Hot Water Repair Cost by choosing a part that won’t burn out in six months. Whether you have a Rheem, AO Smith, or Bradford White, the elements are usually universal screw-in types, but checking the manual is always a safe bet.
Refilling and Preventing Dry Fire
This is the most important step in the entire hot water cylinder element replacement process. If you get this wrong, you will destroy your brand-new element in less than 30 seconds.
Dry Fire occurs when the power is turned on before the heating element is completely submerged in water. Without water to absorb the heat, the element reaches several thousand degrees almost instantly and snaps.
- Close the Drain Valve: Make sure the hose is disconnected and the valve is shut tight.
- Turn on Cold Water: Open the intake valve to start filling the tank.
- Purge the Air: Go to the hot water faucet you opened earlier. At first, it will sputter and hiss as air is pushed out.
- The Three-Minute Rule: Wait until a steady, strong stream of water flows from the faucet with no air bubbles. Let it run for at least three minutes. This ensures the tank is 100% full.
- Check for Leaks: Head back to the heater. Look closely at the new element. If you see even a tiny “weep” of water, give it another slight turn with the wrench.
- Restore Power: Only now can you flip the breaker back on.
It may take 1 to 2 hours for the water to reach full temperature. If you’ve done everything right, you’ve just completed a successful Salt Lake City Water Heater Repair!
Maintenance to Prevent Burnout
To keep from doing this again next year, follow these tips from our Category/Common Water Heater Problems archive:
- Flush the Tank Annually: This removes the sediment that settles at the bottom, which is the #1 killer of lower elements.
- Check the Anode Rod: This “sacrificial” rod prevents the tank from rusting. If it’s depleted, your elements and tank are next.
- Lower the Temp: Setting your thermostat to 120°F (49°C) reduces mineral precipitation and saves on energy bills.
Frequently Asked Questions about Element Replacement
Can I replace just one element in a dual-element heater?
Yes, you can. However, if one has failed due to age or sediment, the other likely isn’t far behind. Since you’ve already gone through the trouble of draining the tank, many homeowners choose to replace both elements and both thermostats at the same time—often called a “tune-up kit”—to ensure another 10 years of worry-free hot water.
What happens if I turn the power on before the tank is full?
As mentioned, this causes a “dry fire.” The element will burn out instantly. You’ll hear a distinct “pop” or “ping” sound, and you’ll have to start the whole replacement process over with a new part. Always verify the tank is full by running the hot tap for three minutes!
How much does professional element replacement cost in 2026?
In April 2026, the average cost for a professional hot water cylinder element replacement in Northern Utah ranges from $200 to $300. This includes the service call, the parts, and the labor. While DIY is cheaper ($10-$60), hiring a pro ensures the job is done to code, the tank is properly flushed, and you have a guarantee on the work.
Conclusion
Tackling a hot water cylinder element replacement might seem intimidating at first, but by following these steps, you can save money and restore comfort to your home. From testing with a multimeter to avoiding the dreaded dry fire, you now have the tools to handle this common Utah plumbing task.
However, we know that life is busy. If you’re in Salt Lake City, Draper, Park City, or anywhere in between, and you’d rather have an expert handle the mess, Honest Home Services is ready to jump in. We provide honest, reliable, and affordable services with a focus on Northern Utah’s unique water needs.
Whether it’s a simple element swap or a full Salt Lake City Water Heater Repair, our local technicians are just a call away. Don’t suffer through another cold shower—let us get things flowing again!