

Water Heater Repair Starts With the Right Diagnosis
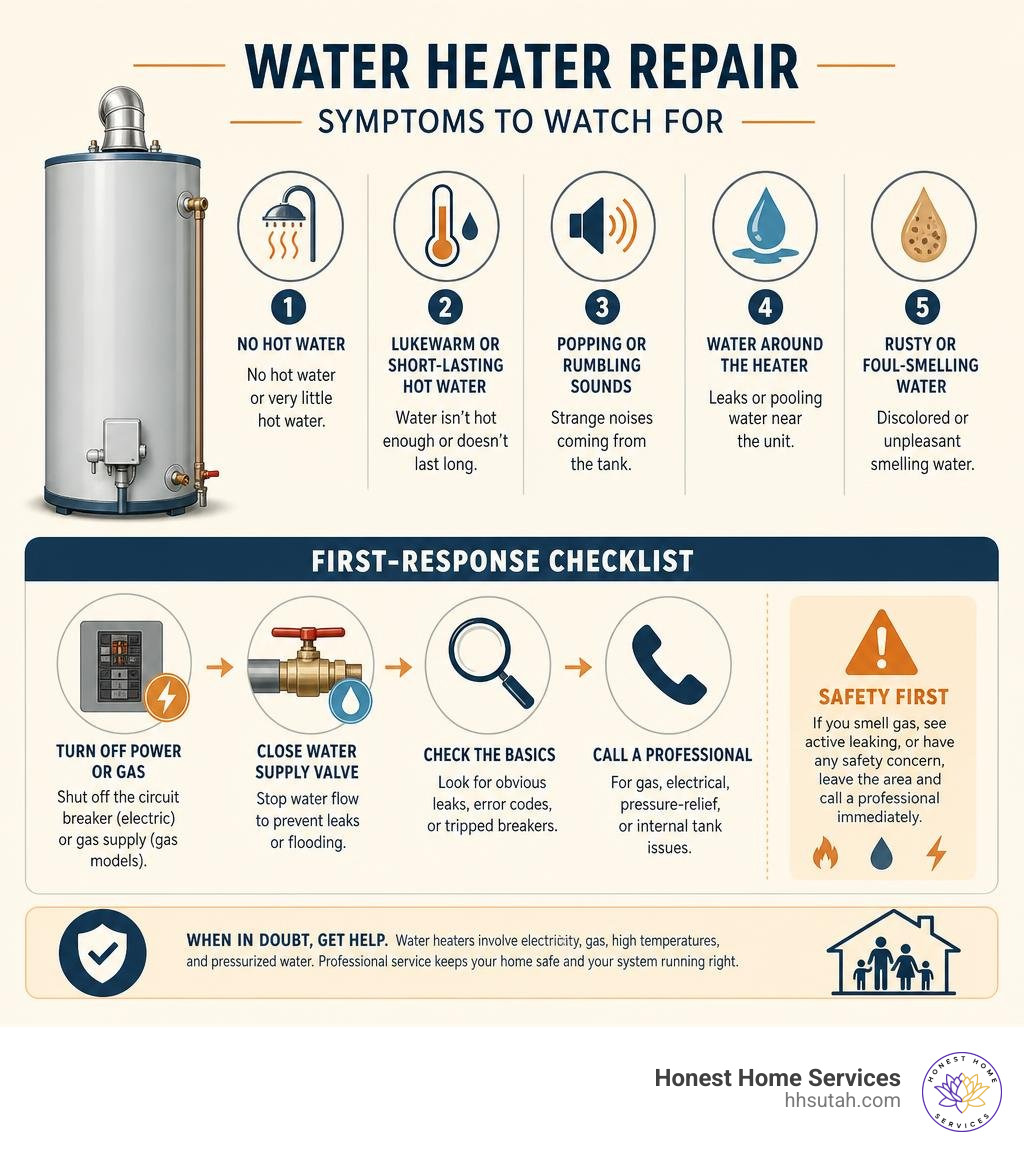
Water heater repair is often possible when the problem is caught early, whether you have no hot water, water that is only lukewarm, a pilot light that will not stay on, strange rumbling sounds, or a leak near the unit.
For a quick answer, use this guide:
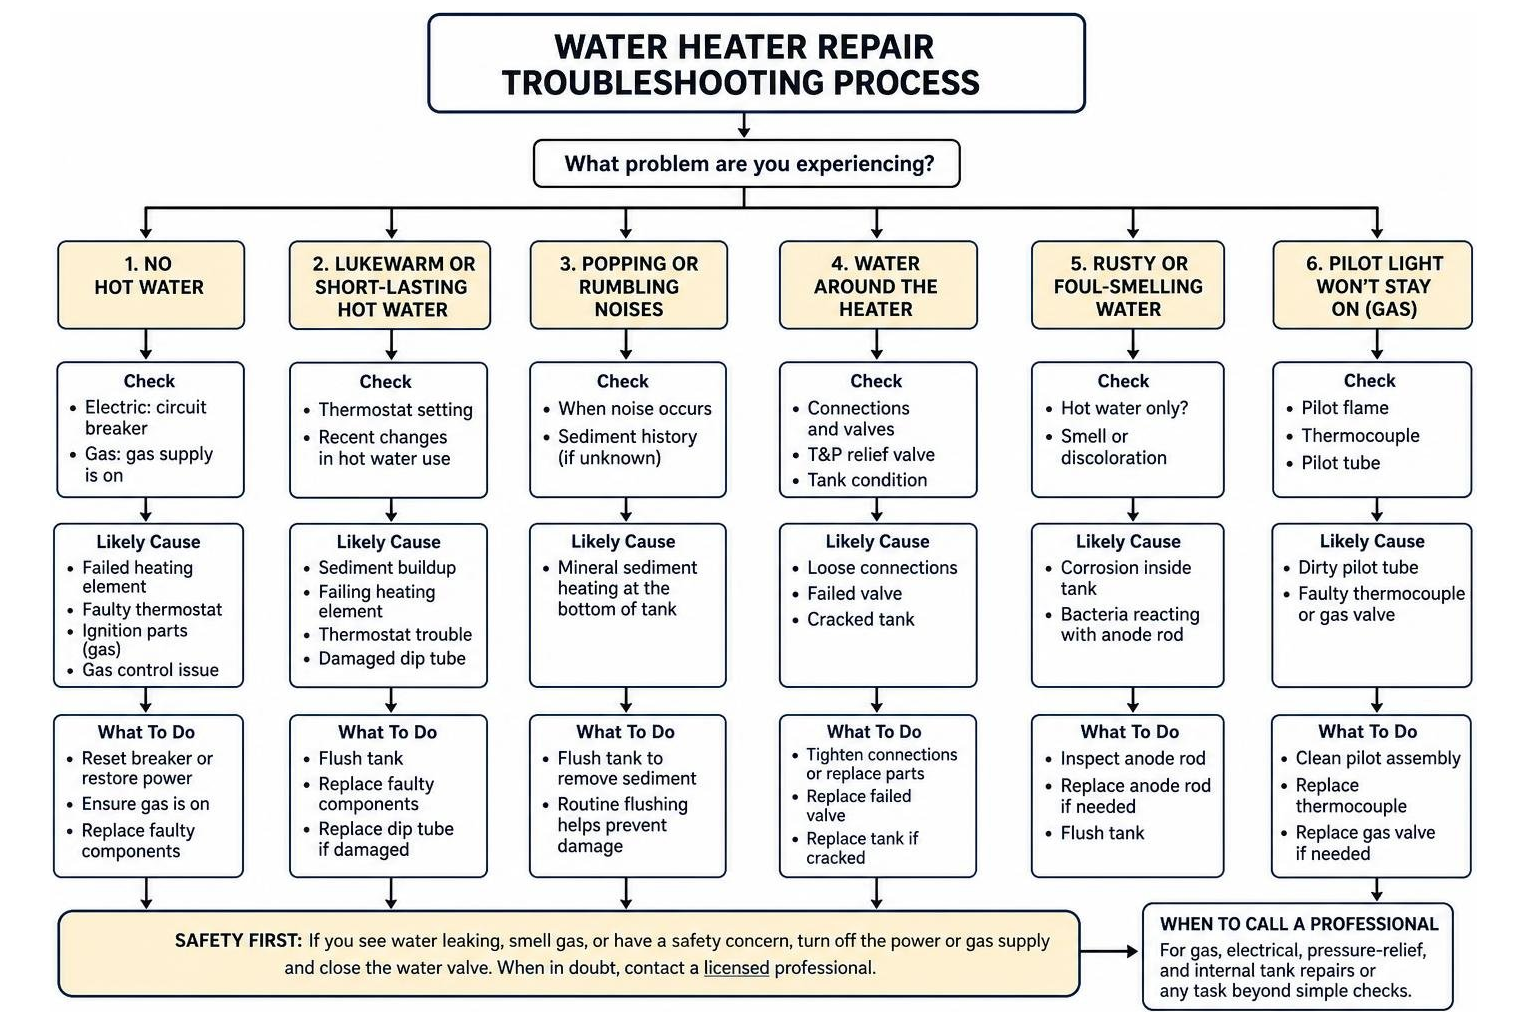
- No hot water: Check the circuit breaker on electric models or confirm the gas supply is on for gas models. Failed elements, thermostats, ignition parts, or gas controls may be involved.
- Lukewarm or short-lasting hot water: Sediment, a failing heating element, thermostat trouble, or a damaged dip tube can reduce performance.
- Popping or rumbling: Mineral sediment may be heating at the bottom of the tank. Flushing can help prevent worse damage.
- Water around the heater: Loose connections and failed valves can often be repaired. A cracked tank usually requires replacement.
- Rusty or foul-smelling water: Corrosion or bacteria reacting with the anode rod may be the cause.
Because water heaters use electricity, gas, high temperatures, and pressurized water, turn off the power or gas supply and close the water valve if there is an active leak or a safety concern. Simple checks are reasonable, but gas, electrical, pressure-relief, and internal tank work should be handled by a licensed professional.
At Honest Home Services, we bring more than 20 years of plumbing and HVAC experience to water heater repair for Northern Utah homes and businesses. Next, we will cover the warning signs that help you act before a small issue becomes a cold shower or water-damage emergency.
Key Signs Your Unit Needs Water Heater Repair
Recognizing early failure warnings saves you from waking up to an icy shower or, worse, a flooded utility room. Across Salt Lake City, Layton, and surrounding Northern Utah communities, water heaters operate under rigorous demand and hard water conditions. Here are the clear indicators that your system requires attention:
- Lukewarm or Inconsistent Hot Water: If your shower starts out warm but quickly turns cold, or if you can never get the water above lukewarm, a single upper or lower heating element may have failed in an electric unit. In gas units, a miscalibrated thermostat or failing burner could be the culprit.
- Loud Popping or Rumbling Noises: Hearing deep rumbling or violent popping sounds from inside the tank? That is the sound of trapped water boiling underneath a heavy layer of mineral sediment.
- Rusty, Metallic, or Discolored Water: Reddish-brown or rusty water coming exclusively from your hot water faucets indicates internal tank corrosion or a failing anode rod.
- Frequent Pilot Light Outages: If you constantly have to re-light the pilot on your gas heater, a dirty pilot tube or faulty thermocouple is likely cutting off the gas supply for safety.
- Active Water Leaks or Moisture Pooling: Finding water around the base of the unit, dripping from cold/hot water inlet connections, or weeping from the Temperature and Pressure (T&P) relief valve requires immediate evaluation.
- Foul “Rotten Egg” Odors: A pungent sulfur smell when running hot water happens when naturally occurring anaerobic bacteria interact with magnesium anode rods inside the tank.
Whether you run a gas water heater, an electric system, or an energy-efficient tankless setup, catching these symptoms early preserves your system’s life. For an in-depth breakdown of system failure signs, read More info on common water heater problems.
5 Proven Methods to Resolve Water Heater Issues
When system issues arise, jumping straight to buying a replacement unit is rarely necessary. Most standard water heater failures stem from specific wearable components—such as thermocouples, heating elements, pressure relief valves, or sacrificial rods—or from scale buildup. Here are five targeted methods to resolve common water heater problems.
Method 1: Pilot Light and Thermocouple Water Heater Repair
Gas water heaters rely on a continuous pilot flame or electronic ignition to heat water. When the burner refuses to stay lit, you are almost always dealing with a pilot or thermocouple issue.
A thermocouple is a small safety sensor positioned right next to the pilot flame. It detects heat and sends a tiny electrical signal to keep the main gas valve open. If the pilot goes out, the thermocouple cools down and safely shuts off the gas supply so gas does not leak into your home.
- Inspect and Clean the Assembly: Over time, carbon deposits, dust, and lint clog the tiny pilot orifice. Cleaning the pilot tube with a small wire brush or canned air restores a strong, blue flame.
- Check for Drafts: A loose combustion door or drafts near the water heater closet can blow out fragile flames.
- Test and Replace the Thermocouple: If the pilot lights while holding down the gas knob but dies immediately upon releasing it, the thermocouple has likely failed. Replacing a bent or oxidized thermocouple with a fresh 24-inch universal replacement component restores reliable operation.
- Examine the Gas Control Valve: If a brand-new thermocouple fails to fix the issue, the internal control board or gas control valve itself may be defective.
For step-by-step guidance on navigating gas line components safely, see our complete Guide to gas water heater troubleshooting.
Method 2: Heating Element and Thermostat Water Heater Repair
Electric water heaters utilize two electric heating elements (upper and lower), each controlled by its own thermostat. When an electric heater delivers lukewarm water or trips your breaker panel, one of these electrical components is usually at fault.
- Diagnosing Upper vs. Lower Element Failures: If the upper element fails, you get no hot water at all. If the lower element fails, the top of the tank gets warm, but you run out of hot water almost instantly.
- Safety Preparation: Always switch off the dedicated double-pole circuit breaker at your main electrical panel and verify the power is off with a non-contact voltage tester before opening access covers.
- Multimeter Testing: Remove the protective covers and insulation from the side of the tank. Set a digital multimeter to measure resistance (Ohms). Disconnect the power wires from the element terminals and place a probe on each terminal screw. A healthy 4500-watt element reads between 10 to 16 Ohms. A reading of zero means an internal short circuit, while an infinite reading indicates a broken filament.
- Continuity Check to Ground: Test each terminal screw against the metal element base. Any reading indicates electrical leakage to ground, which trips breaker panels.
- Element Replacement: Drain the tank water down below the element level, unthread the faulty component using an element wrench, install a fresh element with a new rubber gasket, and refill the tank completely before restoring power. Restoring power to a dry tank burns out new elements in seconds.
Check out our guide to Replacing hot water elements step-by-step for complete safety walkthroughs.
Method 3: Flushing Sediment and Scale Buildup
Hard water in Northern Utah brings dissolved calcium and magnesium minerals into your hot water tank. As water heats up, these minerals precipitate out and settle as sediment at the bottom of the tank.
Over time, sediment forms an insulating blanket over gas burners or buries electric lower elements. This forces your heater to work twice as hard, causing loud popping noises, spiking energy bills, and overheating the tank bottom.
- Turn off the Heat Source: Turn the gas valve to “VACATION” or “PILOT,” or turn off the electric breaker.
- Connect a Hose: Attach a standard garden hose to the drain valve located at the base of the tank and run the opposite end to a floor drain, driveway, or sump basin.
- Open the Drain Valve: Shut off the cold water supply valve to the water heater, open a hot water faucet upstairs to prevent a vacuum, and open the drain valve.
- Flush the Tank: Periodically open the cold water inlet valve in short bursts to stir up and push out heavy sediment sludge accumulated at the bottom.
- Tankless Descaling: For tankless water heaters, scale buildup inside the compact copper or stainless steel heat exchanger blocks water flow and triggers error codes. Descaling involves circulating food-grade white vinegar through the system using a small submersible pump for 45 to 60 minutes once a year.
Method 4: Fixing Leaks and Pressure Relief Valves
A puddle beneath your water heater can look alarming, but not every leak means your unit is ruined.
- Check Connections First: Inspect threaded cold water inlet pipes, hot water outlet lines, dielectric unions, and loose temperature/pressure relief valve connections. Tightening loose threaded fittings fixes many small drips.
- The T&P Relief Valve: The Temperature and Pressure (T&P) safety valve opens automatically if internal tank pressure exceeds 150 PSI or water temperature surpasses 210°F. If your T&P valve is weeping water down its discharge pipe, thermal expansion or excess municipal water pressure may be the cause.
- Replacing a Faulty Safety Valve: If system pressure is normal but the valve continuously drips, shut off the water, drain a few gallons from the tank, unthread the old T&P valve, apply Teflon tape to new threads, and thread in a code-compliant replacement valve.
- Is the Tank Itself Leaking? If water leaks directly from the outer jacket or bottom seams of the tank, the inner steel lining has corroded through. A leaking tank cannot be safely welded or patched; immediate system replacement is required.
To learn more about diagnosing valve drips, read Stop the drip with valve repair tips.
Method 5: Replacing Anode Rods to Eliminate Odor and Rust
The sacrificial anode rod is your water heater’s unsung hero. Suspended inside the tank, this metal rod (made of magnesium or aluminum) deliberately attracts corrosive elements so the steel tank doesn’t rust.
Once the anode rod fully corrodes away, aggressive minerals attack the steel shell directly, leading to short unit lifespans and rust-colored water.
- Identifying Anode Failure: If your hot water looks brown or smells like sulfur, inspect your anode rod.
- Eliminating “Rotten Egg” Smells: In areas with high sulfate content, magnesium rods react with anaerobic bacteria to create hydrogen sulfide gas. Swapping a factory magnesium rod for an aluminum-zinc alloy anode rod stops this chemical reaction and eliminates the unpleasant sulfur smell.
- How to Replace the Rod: Shut off the power or gas, isolate the water line, open a drain valve to relieve pressure, and use a 1-1/16 inch socket with a breaker bar to unthread the top hex head cap. Slide the old core wire out, drop in a new segment or flexible anode rod, tighten firmly, check for leaks, and restore system water flow.
Review our step-by-step instructions on How to change an anode rod to prolong your tank’s service life by 3 to 5 years.
Repair vs. Replace: Making the Right Decision
Deciding whether to pay for water heater repair or invest in a brand-new system comes down to three main factors: age, repair costs, and structural integrity.
| System Consideration | Recommended Action: Repair | Recommended Action: Replace |
|---|---|---|
| System Age | Unit is under 8 years old | Unit is over 10 to 12 years old |
| Repair Cost vs. Replacement | Total repair cost is under 50% of new unit cost | Total repair exceeds 50% of a new system |
| Tank Condition | Tank liner is intact; valves or elements fail | Tank shell is cracked, rusting, or leaking |
| Breakdown History | First or second minor fix in system lifetime | Constant breakdowns requiring repeat service |
| Energy Performance | System heats efficiently after sediment flush | High energy bills due to severe scale buildup |
The general rule of thumb used by plumbing professionals is the 50% Rule. If your water heater is approaching or past its expected lifespan (usually 8 to 12 years for standard tank units) and a component repair costs more than half the price of a replacement unit, installing a new, energy-efficient model makes better financial sense in the long run.
However, if your unit is only 4 years old and needs a replacement element or thermocouple, repair is almost always the right financial choice. For detailed cost-benefit breakdowns, explore Understanding replacement vs repair economics.
DIY vs. Professional Service: Costs, Time, and Safety
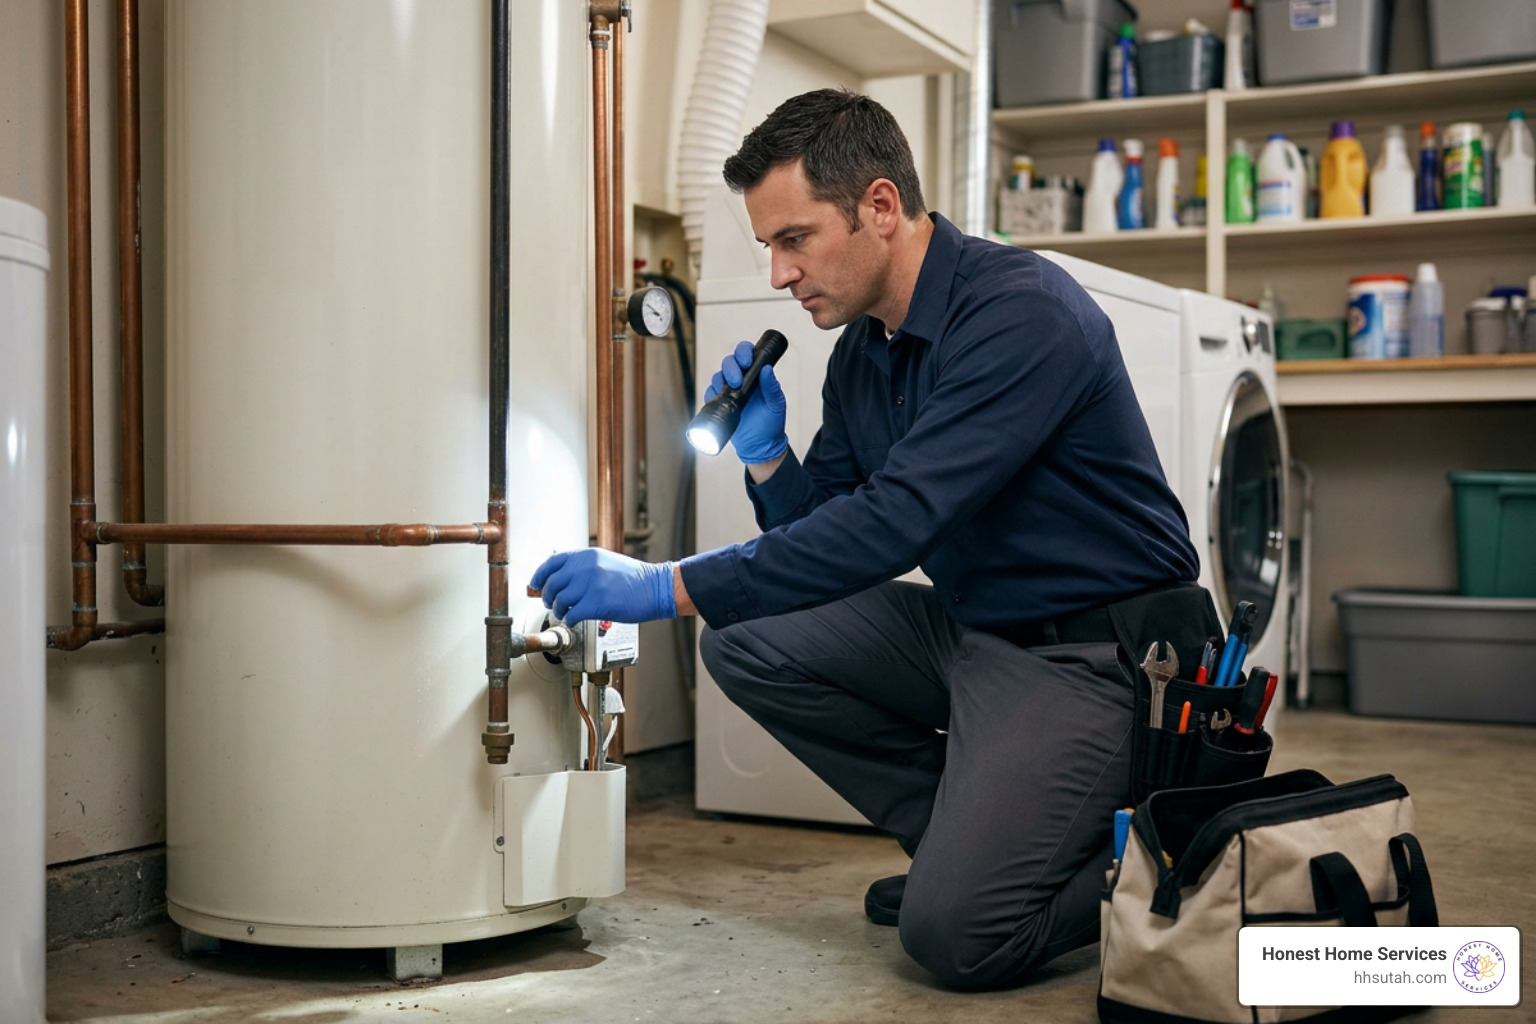
Many basic maintenance tasks—like flushing sediment or checking circuit breakers—are easy for handy homeowners to tackle. However, major repairs involve high-voltage electricity, natural gas connections, carbon monoxide venting, and scalding water under pressure.
- When DIY Makes Sense: Simple checks, resetting tripped upper thermostat limit switches, cleaning surface debris around pilot openings, or replacing visible inlet line washers are manageable DIY projects.
- When to Call a Professional: Replacing gas valves, converting electrical wiring, re-routing flue pipes, replacing cracked tank fittings, or diagnosing internal electronic control boards should be handled by a licensed professional. Mistakes with gas fittings can cause fuel leaks, while improper wiring creates severe fire hazards.
- Repair Timeframe: Most standard professional repairs take between 1 to 3 hours to complete once diagnosed.
- Typical Repair Costs: Component repairs vary based on component complexity, gas vs. electric configurations, and local access. Standard part repairs are far more economical than emergency full-system replacements.
- Finding Local Experts: When searching local directories like the Salt Lake City Plumbing Directory, choose licensed, insured contractors who offer transparent upfront pricing.
To get a better idea of expected service expenses, review our detailed guide on Understanding water heater repair costs.
Frequently Asked Questions About Water Heater Troubleshooting
What should I do if my water heater stops working completely?
If your hot water stops working unexpectedly, follow these steps:
- Check Power or Fuel: For electric heaters, look at your main panel for a tripped breaker. For gas heaters, verify that the gas shutoff valve is open and check if the pilot flame is lit.
- Inspect for Leaks: Look around the base of the unit. If you see pooling water, immediately shut off the cold water supply valve at the top of the tank to limit water damage.
- Shut Off Fuel/Power Before Inspecting: If you smell natural gas (a rotten cabbage or skunk-like odor), evacuate the house immediately without touching electrical switches, and call your gas utility company or local emergency services from outdoors.
- Call for Service: If basic checks don’t resolve the problem, call a local specialist. Review these Emergency water heater response steps to manage sudden system failures safely.
Is water heater repair covered under warranty, and how do I check?
Most major manufacturers provide explicit limited warranties covering key parts and tank shells for 6 to 12 years from installation.
- How to Check Your Warranty: Find the data plate sticker on the side of your water heater tank. Note down the brand name, model number, and full serial number.
- Decode the Serial Number: Visit the manufacturer’s website and enter your serial number into their warranty lookup tool. The serial number encodes the manufacture date.
- What Is Covered: Standard warranties usually cover replacement parts (thermostats, elements, burners, valves) free of charge if they fail within the warranty period. However, manufacturer warranties rarely cover local labor fees unless you purchased an extended service package.
How long does a typical water heater repair take?
Once a technician diagnoses the problem, standard water heater repair tasks usually take less than two hours. Simple component swaps—such as replacing a thermocouple, flushing a mildly scaled unit, or replacing a faulty T&P relief valve—are often completed in 45 to 90 minutes.
More complex repairs, like replacing dual heating elements, clearing heavy sediment blocks, or swapping gas control valves, can take two to three hours.
Conclusion
Routine care is the best way to keep your home’s hot water running reliably. By flushing your tank annually, replacing worn anode rods, and addressing minor valve drips quickly, you can avoid unexpected breakdowns and costly emergency replacements.
When you need reliable, professional plumbing assistance in Salt Lake City, Layton, or anywhere across Northern Utah, turn to Honest Home Services. We provide fair pricing, clear diagnostic evaluations, guaranteed customer satisfaction, and 24/7 emergency response. Contact us today to schedule your annual maintenance or book fast, expert repairs with our local team at Salt Lake City Water Heater Repair.