
Is Adding a Heat Duct to Your Basement or Addition Actually Doable?
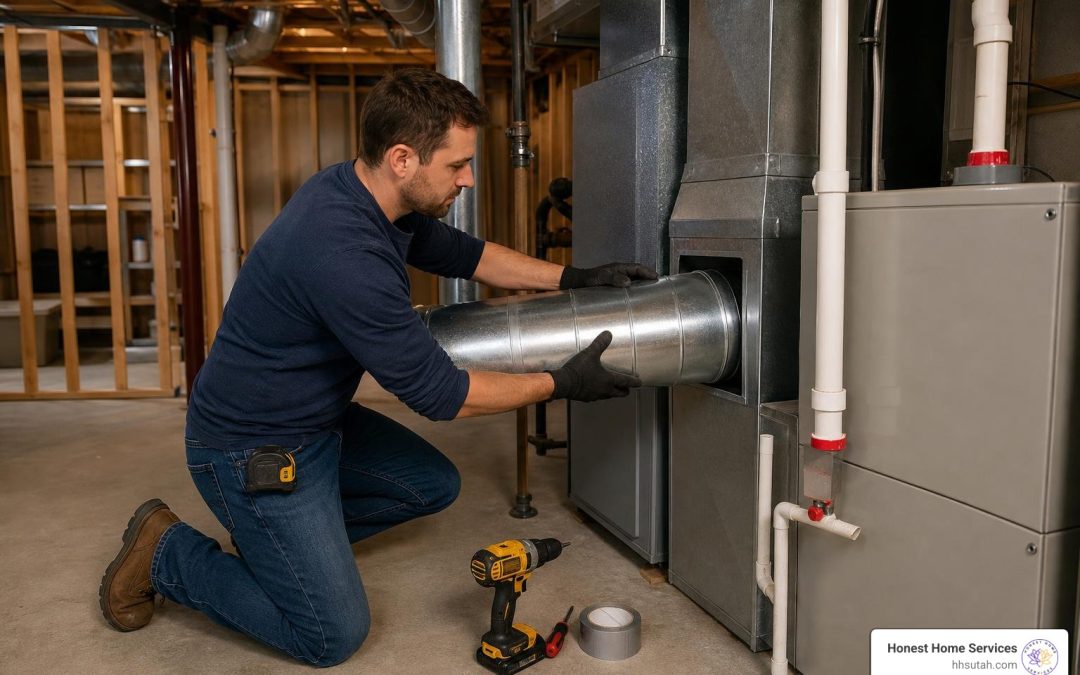
Adding a heat duct to a cold basement or new room addition is absolutely something many homeowners can tackle — but it’s more involved than just cutting a hole and running some flex duct.
Here’s a quick overview of what the process involves:
- Check your blower capacity — confirm your furnace has enough CFM headroom to feed a new duct without starving other rooms
- Run a new line to the trunk or plenum — never splice into an existing branch duct serving another room
- Cut the tap-in opening — use tin snips or a rotary tool to cut into the main trunk line
- Install a take-off collar — secure it with sheet metal screws
- Run and support your duct — support flexible duct every 4 feet with no more than ½ inch of sag
- Seal all connections — use aluminum foil tape or duct mastic (never standard cloth “duct tape”)
- Install the register — secure directly to sheet metal with screws
- Balance the system — adjust manual dampers on branch lines to restore even airflow throughout your home
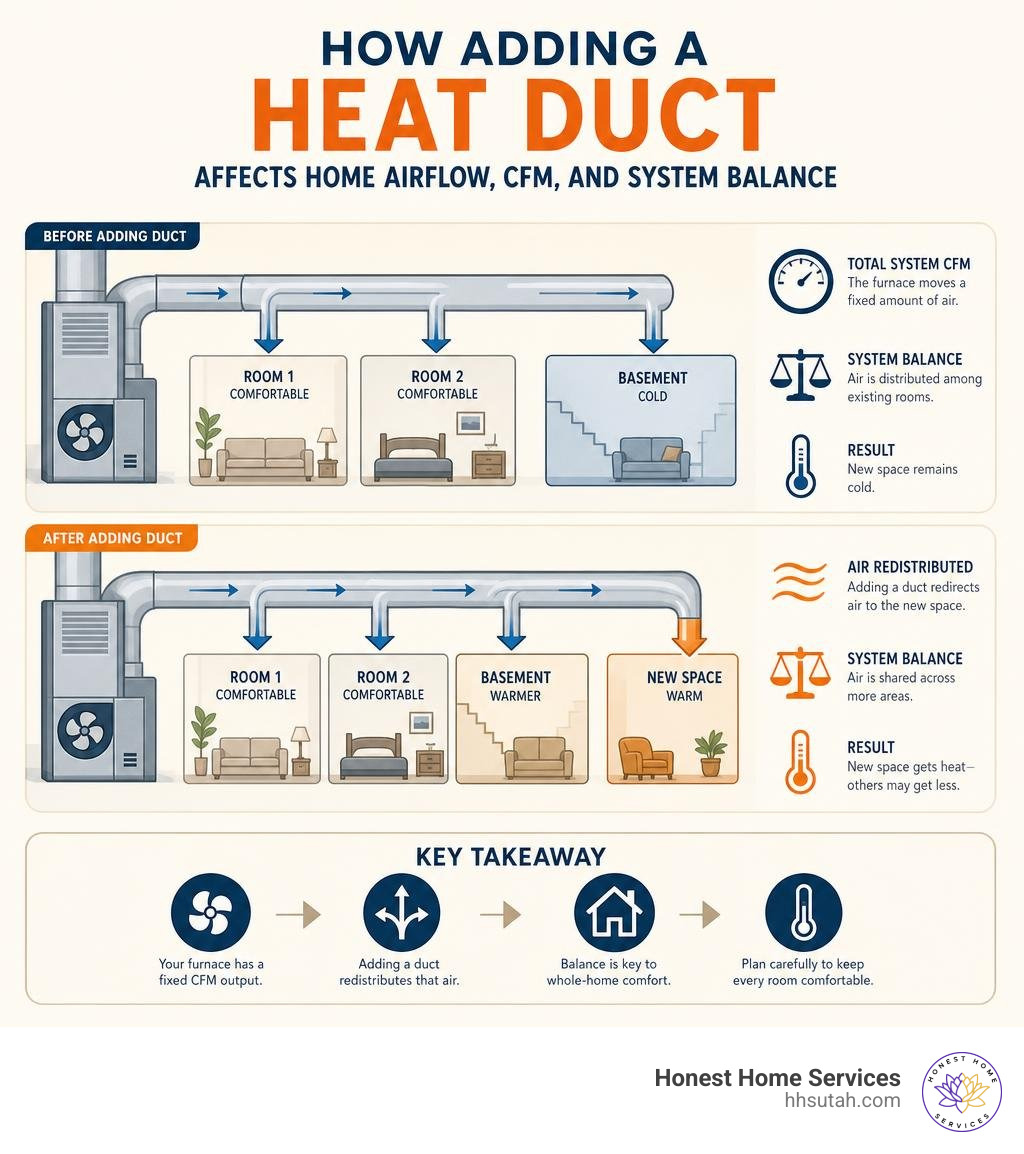
The biggest trap homeowners fall into? Assuming that more vents means more heat. It doesn’t. Your furnace produces the same total amount of airflow no matter how many ducts you add. Adding a new duct simply redirects air that was already going somewhere else — and if you don’t plan carefully, you’ll warm the basement while freezing the second floor.
At Honest Home Services, we’ve spent over 20 years helping Northern Utah homeowners with exactly this kind of heating challenge — from evaluating furnace blower capacity before adding a heat duct to designing and installing balanced duct systems that actually work. If any step of this guide feels over your head, we’re here to help.
Can You Tap Into Existing Ductwork for a New Space?
When homeowners look at their exposed basement ceiling and see those massive metal channels, the temptation is strong to think, “Hey, there’s heat in there! I’ll just cut a hole and let the warm air flow.” While you can indeed tap into existing ductwork, you cannot do it blindly.
Your home’s forced-air system relies on a delicate balance of supply air, return air, and static pressure. Think of your ductwork like a plumbing system: if you open a massive new valve downstairs, the water pressure on the top floor is going to plummet.
Your furnace blower pushes conditioned air out through the supply plenum and into the main trunk line. After circulating through your rooms, that air must be drawn back through the return air grilles. If you add supply ducts without also ensuring there is an adequate return air path, you will create a pressurized pocket in the new room. The air will stop circulating, leaving your new addition or basement office feeling stuffy and cold.
Before you make a single cut, it is critical to evaluate whether your overall system can handle the expansion. If you are already struggling with uneven temperatures or weak airflow, it might be time to check out our guide on How to Handle AC Furnace Maintenance Without Losing Your Mind to ensure your basic system is running optimally before adding more demands to it.
Splicing vs. Running a New Line
One of the most common DIY shortcuts is splicing directly into an existing branch duct that already feeds another room. This is a recipe for mutual disappointment.
Splicing a new line into a standard 6-inch branch duct will starve both the original terminal room and your new room of airflow. Instead of having one perfectly heated room, you will end up with two freezing rooms.
The correct approach is always to run a dedicated new line back to the main trunk line or the supply plenum. By tapping directly into the main trunk, you draw from the main air supply where the pressure is highest, rather than robbing a single room of its comfort.
While running a new line might require more material and effort, it prevents major airflow starvation issues. Additionally, as you open up ceilings and walls to run these lines, it is the perfect time to investigate potential energy losses. You can read more about sealing your home’s envelope in The Draft Detective: Uncovering Air Leaks in Your House to ensure your newly heated space actually holds onto its warmth.
Sizing and Balancing: The Physics of Adding a Heat Duct
HVAC design is a science. Before adding a heat duct, professional technicians rely on two main calculations: Manual J (to determine how much heat the room actually needs based on its size, insulation, and windows) and Manual D (to design the ductwork layout and size the ducts correctly).
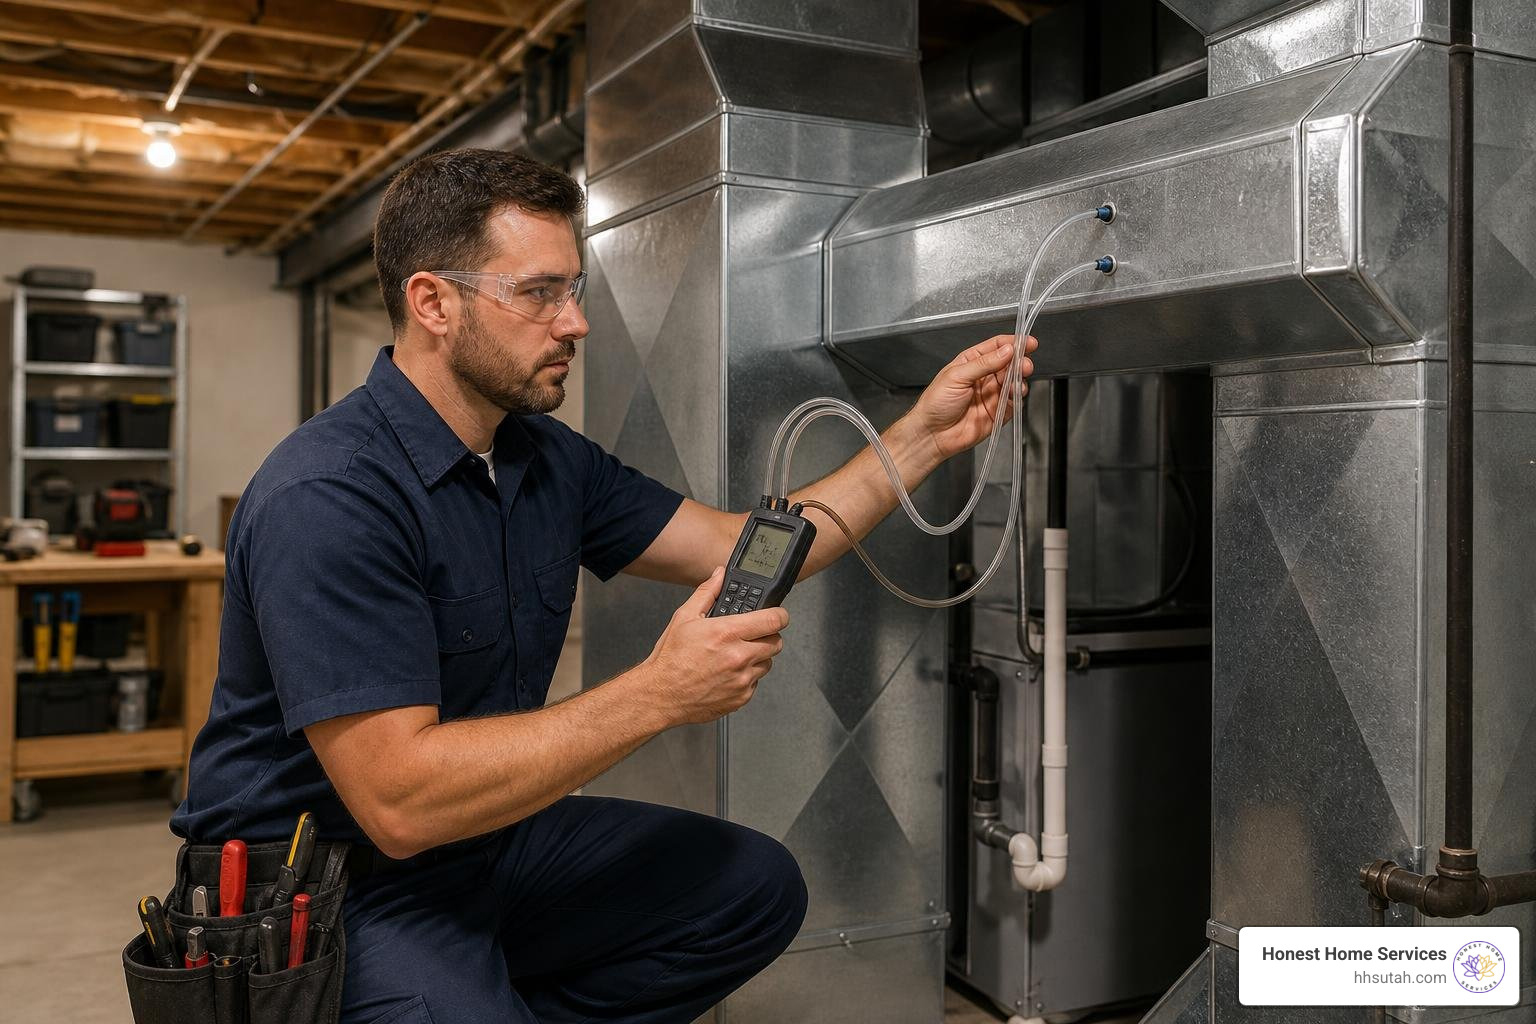
When you add ducts, you alter the system’s static pressure. Interestingly, adding more duct pathways actually reduces the overall static resistance of the system, which blower motors generally love. However, the real challenge is air distribution. If the blower capacity is maxed out, you will experience a drop in velocity across all vents.
Here is a quick reference table showing how different duct sizes translate to typical airflow capacities in standard residential systems:
| Duct Diameter (Round) | Typical CFM Capacity (at 0.1″ Static Pressure) | Recommended Room Size (Approximate) |
|---|---|---|
| 4 Inches | ~30 – 40 CFM | Very small bathrooms, closets |
| 5 Inches | ~50 – 60 CFM | Small bathrooms, small walk-in closets |
| 6 Inches | ~80 – 100 CFM | Standard bedrooms, small home offices |
| 7 Inches | ~110 – 130 CFM | Medium bedrooms, dining rooms |
| 8 Inches | ~150 – 180 CFM | Large living rooms, basement family zones |
Calculating CFM and Blower Capacity
To determine if your system has the capacity to handle adding a heat duct, you need to look at your furnace or air conditioner’s blower rating.
For example, a standard 3-ton AC system typically requires about 1200 CFM (Cubic Feet per Minute) of airflow (roughly 400 CFM per ton of cooling capacity). If you are finishing a basement and planning to add four new 6-inch heating registers, you will require approximately 320 CFM more airflow capacity (roughly 80 CFM per 6-inch duct).
If your furnace blower is already running at its maximum limit to keep your upper floors comfortable, adding that 320 CFM demand will severely compromise the climate control in the rest of your home. If you want to keep your system breathing easily and performing at its peak, don’t forget the basics of system maintenance, which you can explore in The Ultimate Guide to Finding Local HVAC and Furnace Air Filters.
Balancing Airflow with Manual Dampers
Because you cannot easily change your furnace’s total air output, the secret to a comfortable home after adding a duct is system balance.
The only way to prevent your new duct from robbing air from upstairs rooms is to install manual dampers in your branch lines. A manual damper is a simple metal valve inside the duct that can be rotated to restrict or open up airflow.
By installing dampers on your new run and your existing runs, you can dial in the system. In the winter, you might restrict airflow to the naturally warm upper floors and open up the dampers to your cold basement. In the summer, you can reverse the process.
For a deeper dive into managing your home’s climate comfort without losing your sanity, check out Don’t Sweat It: Your Guide to Finding Honest HVAC in Salt Lake City.
Step-by-Step Guide to Adding a Heat Duct
If you have confirmed your system has the capacity and you have mapped out a route back to the main trunk line, you are ready to begin the physical installation.

Before starting, gather the necessary tools and safety gear:
- Tin snips (aviation snips – left, right, and straight cuts)
- Drill with a 1/4-inch hex head driver and metal drill bits
- Utility knife
- Safety glasses, heavy leather work gloves, and a dust mask
- Sheet metal take-off collar (matching your new duct’s size)
- Flexible insulated ducting (UL-181 rated) or rigid sheet metal duct
- Sheet metal screws (zip screws)
- Aluminum foil tape (approved for ductwork) or mastic duct sealer
- Nylon duct straps and a tensioning tool
As you begin cutting into your home’s ductwork, keep in mind that any unsealed joint can leak valuable conditioned air into your wall cavities. To understand the impact of these unseen losses, take a look at Your Home’s Hidden Drafts: A Guide to Air Leak Detection.
Step-by-Step Instructions for Adding a Heat Duct
Follow this sequence carefully to ensure a secure, airtight, and code-compliant installation:
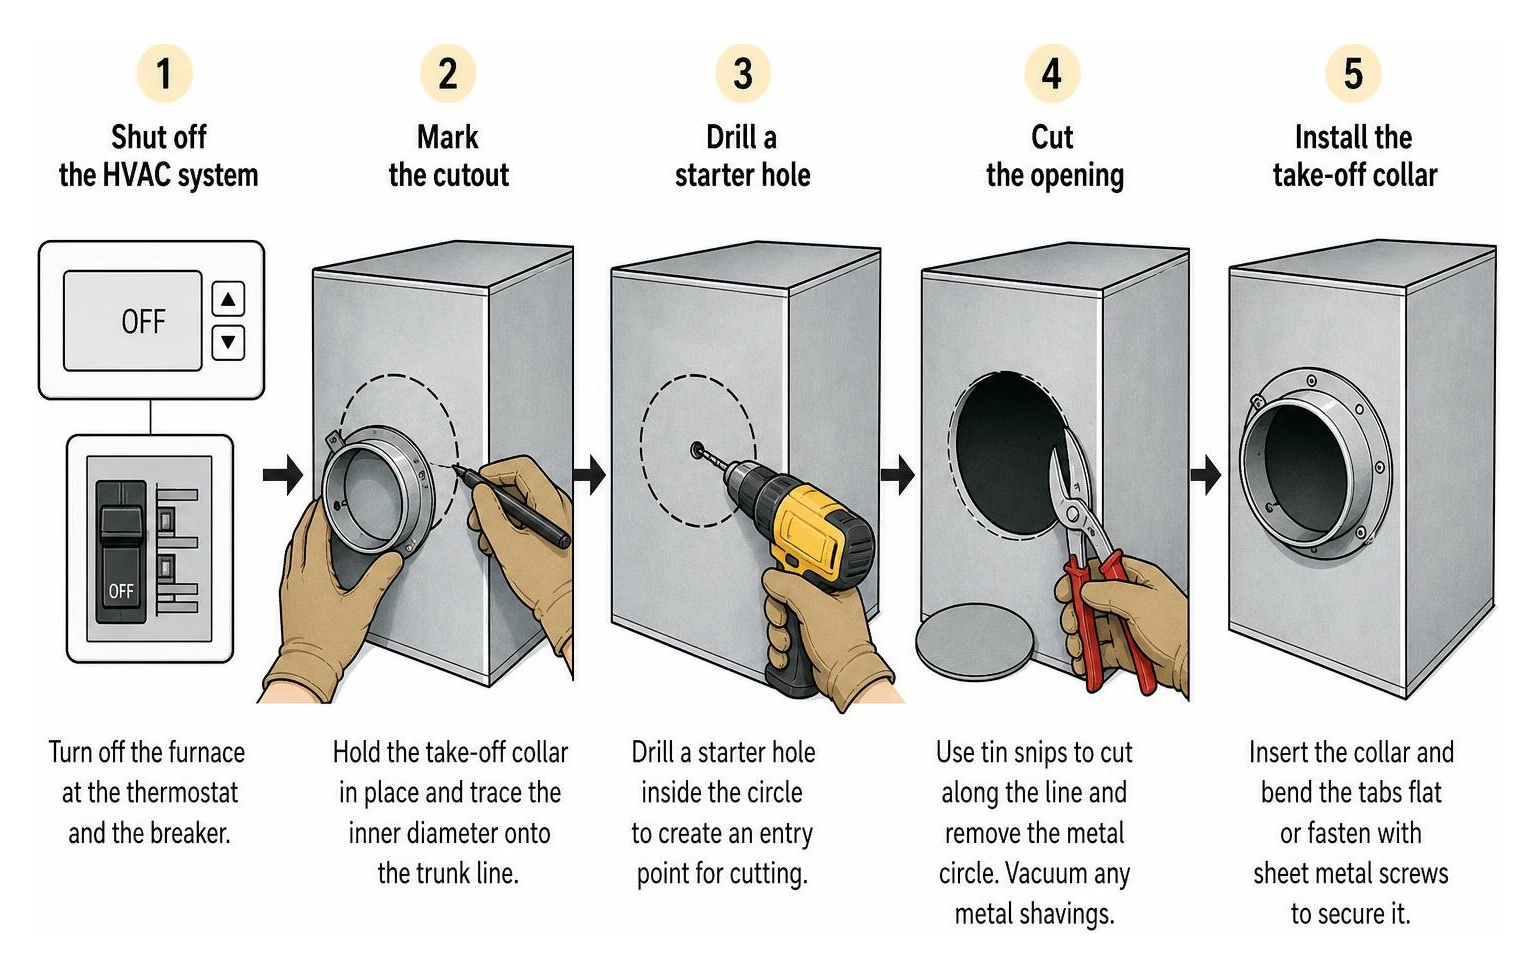
- Shut off the HVAC system: Always turn off your furnace at the thermostat and the breaker before working.
- Mark the cutout: Hold your take-off collar against the side of the main trunk line where you plan to tap in. Trace the inner diameter of the collar onto the trunk line with a marker.
- Drill a starter hole: Wearing safety glasses and gloves, drill a starter hole inside your marked circle using a step drill bit or a large metal bit. This gives your tin snips an entry point.
- Cut the opening: Insert your aviation snips into the starter hole and carefully cut outward to your marked line, removing the metal circle. Vacuum any metal shavings from the inside of the duct to prevent them from blowing into your living spaces later.
- Install the take-off collar: Insert the collar into the opening. Bend the metal tabs on the inside of the collar flat against the interior wall of the trunk line to secure it, or use self-tapping sheet metal screws through the collar flange.
- Seal the collar joint: Apply a generous layer of brush-on mastic duct sealer or wrap the joint tightly with premium aluminum foil tape to prevent air leaks at the connection point.
- Run the ductwork: Connect your ducting to the collar. If using flexible ducting (which must meet UL-181, Class I requirements), pull it tight. Excess slack or loops restrict airflow. Support the duct at intervals of no greater than 4 feet using nylon straps, ensuring there is no more than 1/2 inch of sag between supports.
- Connect and seal the register box: Run the duct to your new register location. Secure the duct to the register boot using nylon zip ties and tensioning tools, then seal the outer jacket with aluminum tape. Secure the register box to your wall or floor framing.
- Install the grille: Screw the register grille directly to the wall or floor framing over the boot opening.
- Test and balance: Turn your HVAC system back on, check for leaks along your new run, and adjust your manual dampers to achieve comfortable airflow.
Note: If you are working with specialized installations, such as supplemental heat distribution systems, always consult the manufacturer’s documentation, such as the HEAT-DUCT manual, to ensure compliance with specialized clearance and configuration rules.
Common Mistakes to Avoid When Adding a Heat Duct
Ductwork modification is deceptively simple physically, but highly regulated by building codes for safety and efficiency. Avoid these common DIY pitfalls:
- Using wood inside ductwork: Never use wood furring strips or blocks inside a duct to mount a register grille. Duct air temperatures can exceed 120°F, and building codes strictly prohibit combustible materials inside the air stream due to fire hazards.
- Using standard cloth “duct tape”: Despite its name, standard cloth duct tape is useless for actual ductwork. The adhesive dries out and fails under constant temperature fluctuations. Always use code-approved aluminum foil tape or mastic sealer.
- Neglecting clearances: If you are running high-temperature venting or ducting near fireplaces, maintain a minimum clearance to combustibles of at least 1 inch (25 mm) for B-vent ducting, as detailed in professional Installation Instructions .
- Kinking flexible ducts: Sharp bends in flexible ducting can reduce airflow by up to 50%. Keep your turns smooth and sweeping.
Alternative Heating Solutions for Basements and Additions
Sometimes, extending your existing central HVAC system isn’t the most practical or cost-effective choice. If your furnace is already at its capacity limit, forcing it to heat a new space will only lead to system wear, high energy bills, and cold rooms.
Fortunately, you have several highly efficient alternatives:
- Ductless Mini-Splits: These systems consist of an outdoor compressor and an indoor wall-mounted air handler. They provide incredibly efficient, independent heating and cooling for a single zone without requiring any ductwork.
- Radiant Floor Heating: Perfect for cold concrete basement floors, radiant heating loops (either electric or hydronic) warm the floor directly, creating an incredibly comfortable, even heat.
- Electric Wall Heaters or Baseboards: While less efficient to run long-term than mini-splits, they are inexpensive to install and work well for rooms that only need occasional heating.
To explore all of your home heating options in Northern Utah, take a look at our comprehensive Heating services page.
Fireplace Heat Reclamation Kits
If you have a gas or wood fireplace in your home, you can actually harness its excess heat to warm other rooms using a dedicated heat reclamation kit.
These systems use a fan-powered duct kit to actively draw warm air from the fireplace chase and route it to a cold basement room or an adjacent space up to 20 feet away for gas systems (using kits like the Heat-Zone ® Gas Air Duct Kit ), or up to 40 feet away for wood-burning systems.
These setups can run as a Push System (with the fan mounted near the fireplace) or a Pull System (with the fan mounted near the destination register). Some modern systems even utilize a Ducted Passive Heat System for Heat Management , which redirects heat naturally through gravity and convection to keep the walls above your fireplace cool enough to mount a TV safely.
Frequently Asked Questions About Ductwork Expansion
Do I need a permit to add a heat duct?
Yes. In Salt Lake County, Davis County, and surrounding Northern Utah areas, modifying your home’s HVAC system by adding new supply runs requires a mechanical permit. This ensures your installation complies with the International Mechanical Code (IMC), protecting your home’s safety and resale value. If you need help navigating local codes, check out The Ultimate Salt Lake City HVAC Repair Survival Guide.
Can I use standard cloth duct tape to seal my new ductwork?
Absolutely not. Standard cloth duct tape is a code violation on actual HVAC ducts. It degrades quickly under heat. You must use UL-181 rated aluminum foil tape or brush-on duct mastic to prevent air leaks and comply with local building codes.
How do I know if my furnace blower can handle another vent?
An HVAC professional must measure your system’s current external static pressure and compare it against your blower motor’s performance curve. If you want to find a certified local expert to evaluate your system, consult our guide on how to Beat the Heat: How to Locate Certified HVAC Dealers in Your Area.
Conclusion
Adding a heat duct is a highly effective way to reclaim cold spaces in your home, provided you respect the physics of airflow, static pressure, and system balance. While the physical installation is a great project for a handy DIYer, sizing your system and ensuring you don’t starve your upper floors of air requires technical expertise.
If you are planning a basement remodel or home addition in Salt Lake City, Layton, Draper, or anywhere else in Northern Utah, let our team at Honest Home Services take the guesswork out of your project. We can perform professional Manual J and Manual D calculations, evaluate your blower capacity, and install a perfectly balanced system that keeps your entire family comfortable.
Ready to get started? Schedule a professional furnace installation or duct evaluation with us today!